© ROOT-NATION.com - Use of content is permitted with a backlink.
The motherboard is an important foundation of any computer. The quality of the board will determine the reliability of the entire assembly, and its functionality will determine the ability to upgrade and flexibly configure various parameters. When planning to build a gaming station, the motherboard should play the most important role and be chosen with the utmost responsibility. Today we’re going to take a look at the B760-PLUS WIFI motherboard from ASUS and try to find out if it’s suitable for a modern gaming PC.
Read also: Corsair Vengeance review: From mid-range to flagship with RGB
Price and market positioning
As for the price, it is the most democratic for a product with such a set of advantages. $250 is a bit expensive for an average board, but B760-PLUS WIFI looks like a real gift for the money. There’s nothing to be surprised at, because although the board is positioned by the manufacturer as a mid-budget one, it actually has most of the characteristics similar to the top-end motherboards.
ASUS B760-PLUS WIFI package contents
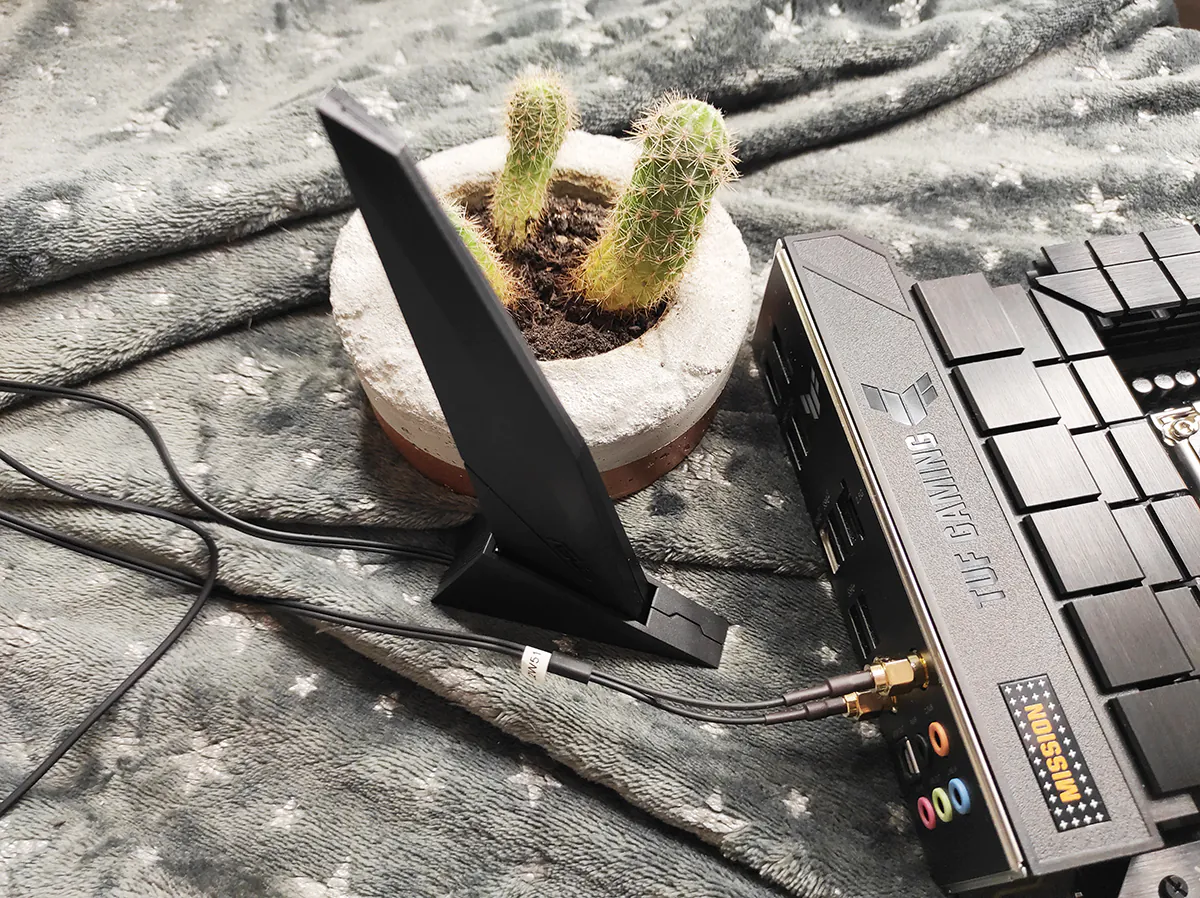
So, the longed-for moment! We have a box on our table with the coveted inscription “TUF GAMING” on it, and the key characteristics of the product are highlighted on the box, which are very, very worthy, it should be noted. What is waiting for us inside? As the saying goes, “in search of the incredible”. The first thing that greets us, of course, is the board itself in an antistatic package, but we’ll come back to it later. What else is there? A Wi-Fi antenna with a proprietary gaming design along with a stand.
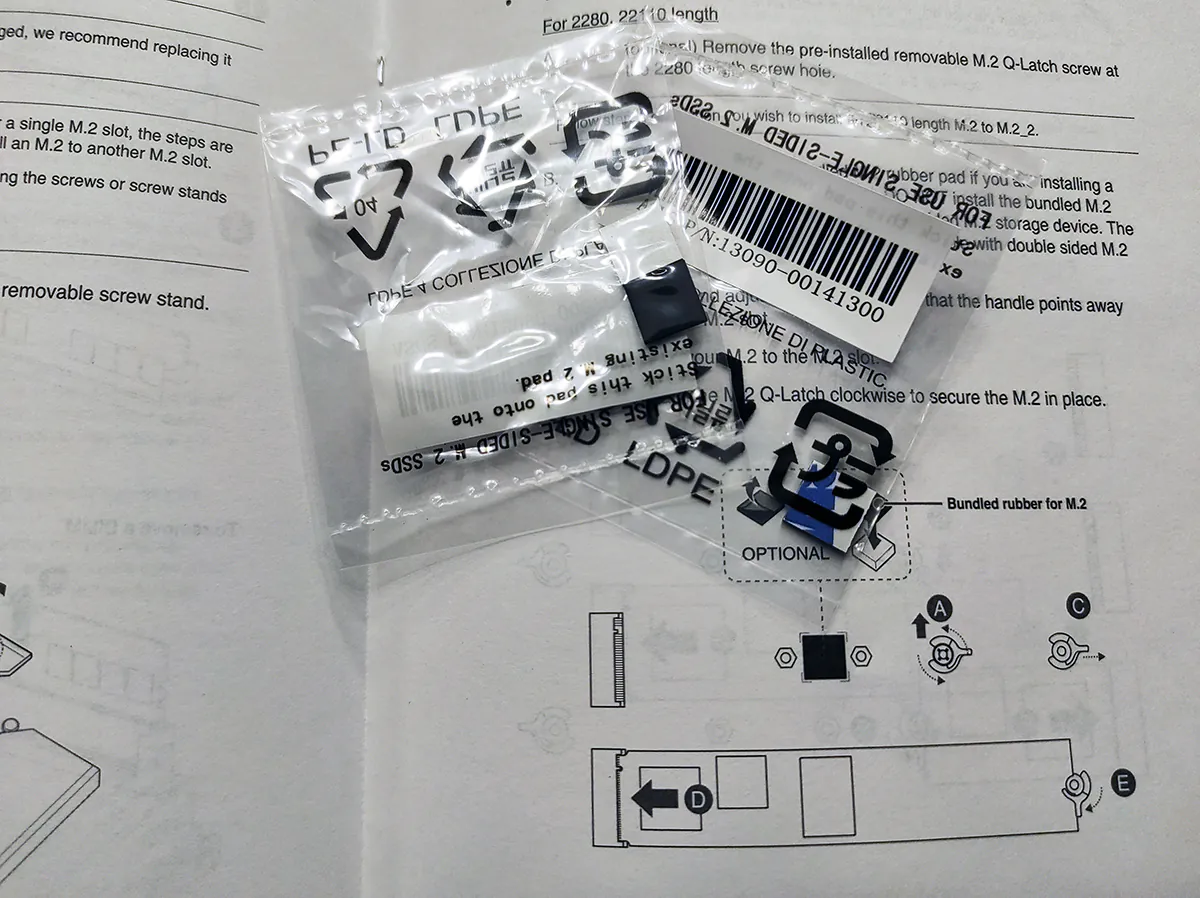
Then there are two SATA 3.0 cables, a mount for M.2 drives, and a couple of silicone dampers for the same drives. It’s definitely a good thing when a manufacturer takes care of even such little things.
From the paper brochures, we are greeted with a quick start guide, a TUF GAMING certificate of conformity, an English user manual and a set of beautiful branded stickers.

The first look
Here we have it in our hands, a fashionable but serious ATX motherboard made on a glossy black textolite. The first thing that catches your eye is the brutal design and the abundance of cooling radiators. The most massive of them covers nine phases of the CPU power supply, a slightly smaller one covers six phases of the B760 chipset, which itself is covered with a branded radiator.
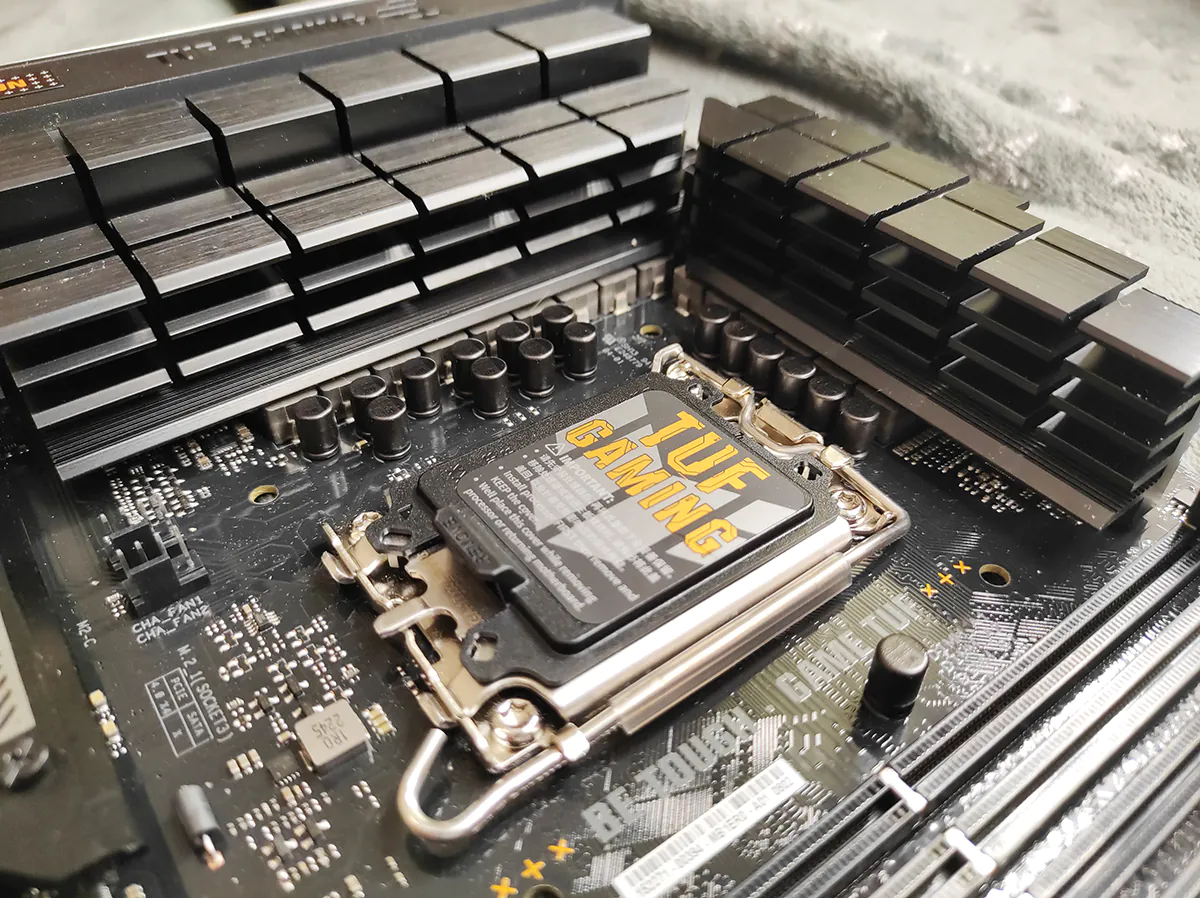
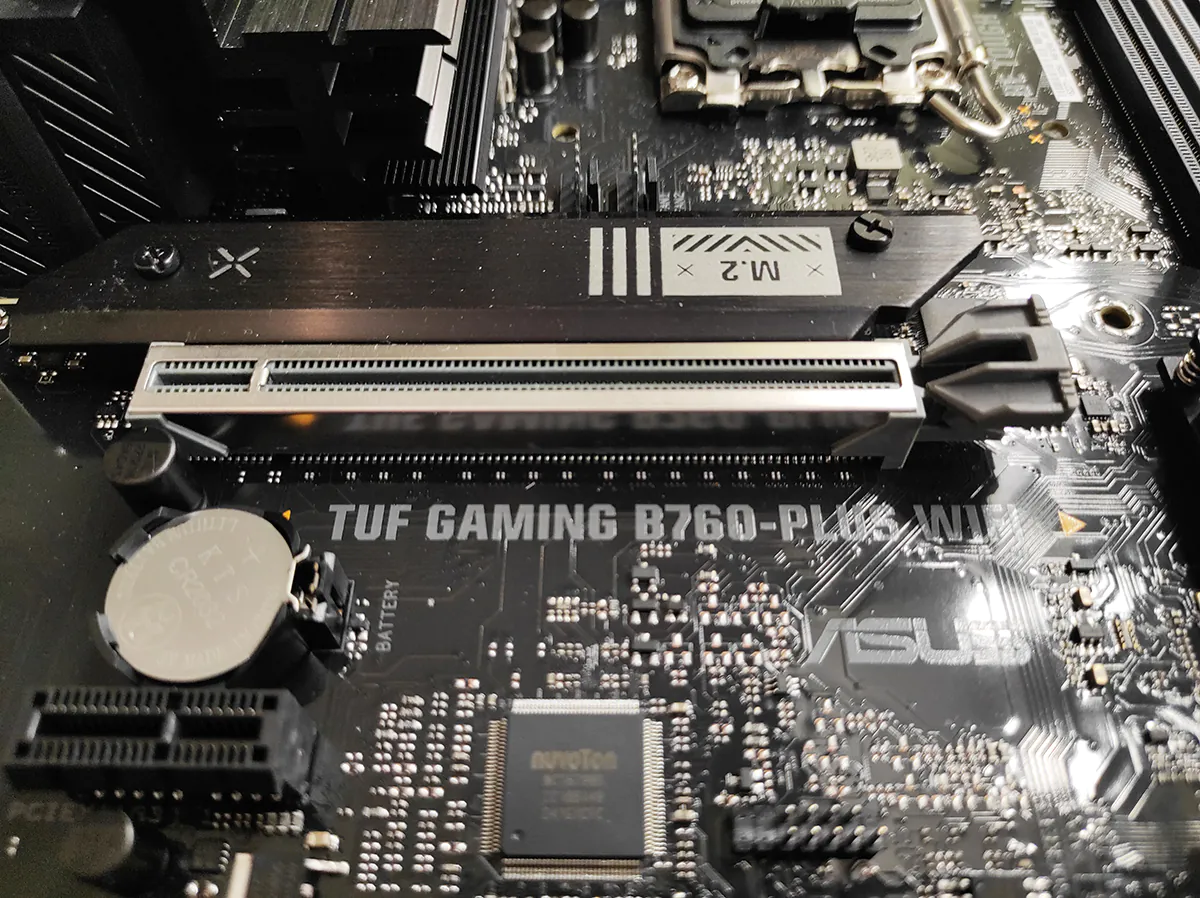
The M.2 slots are also not left without cooling – radiators are present there as well. The external connector block is completely covered with a protective screen. The PCIe 5.0 connector is also shielded
There is a separate isolated audio path with a microcircuit in a noise-resistant housing and audio capacitors.
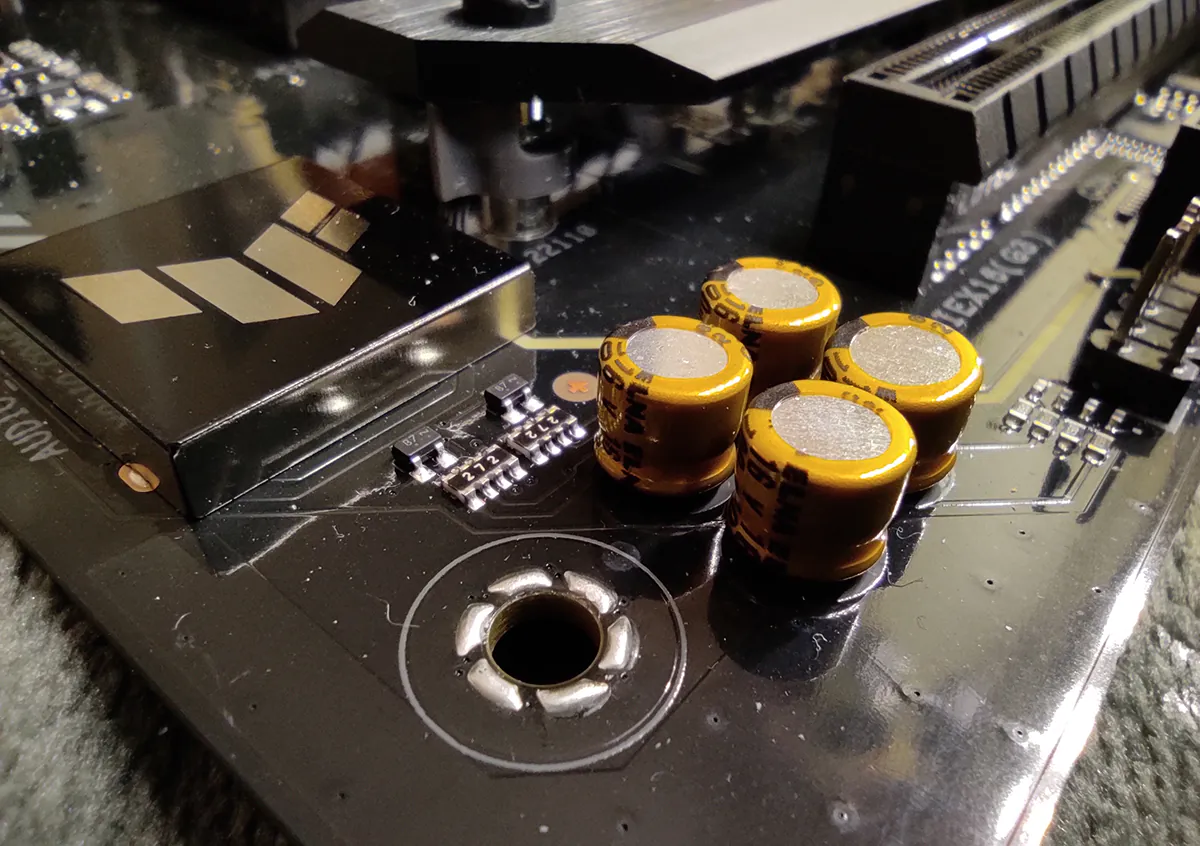
In general, the board design can be described in three words: serious, brutal, and black. As they say, “beautiful”.
Ports and interfaces
I propose to go through the ports and expansion connectors, because they directly affect what equipment we can connect to the motherboard and what hardware we can use in our own builds. Let’s start with the outer panel, where we are warmly greeted by ports for connecting monitors – HDMI 2.1 and DP 1.4
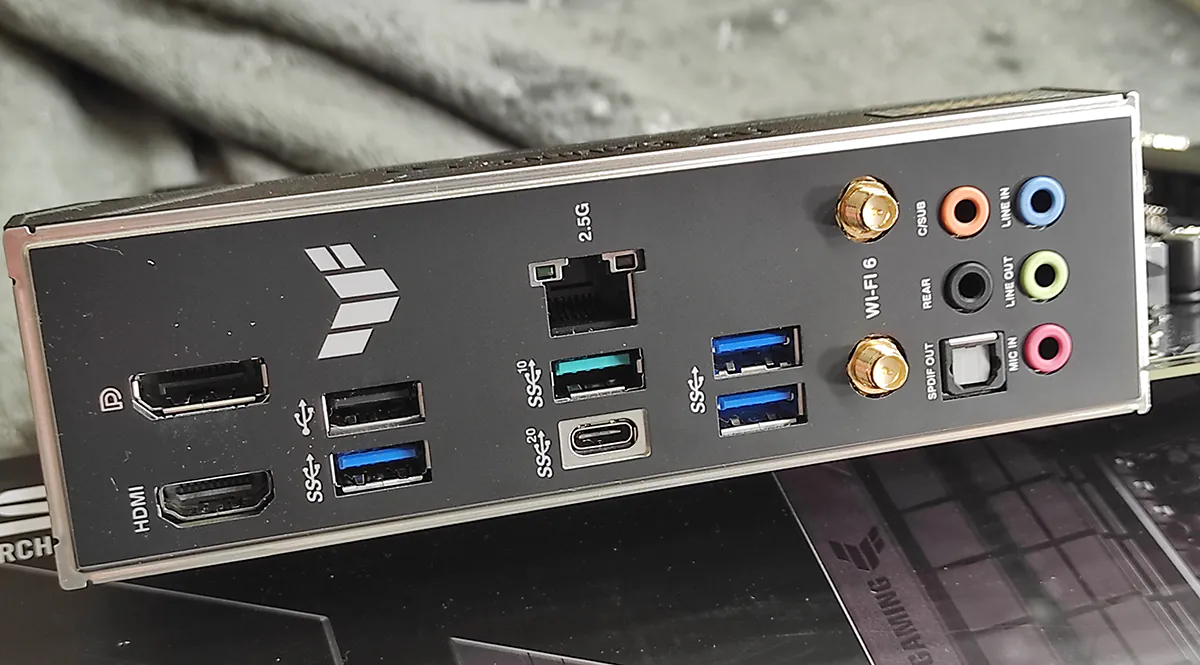
The network interfaces include an Ethernet port with up to 2.5 Gbit and two connectors for connecting a Wi-Fi 6 antenna. Sound is output via both optical and 3.5 mm ports. The sound here, by the way, is supported up to the 7.1 configuration. USB ports deserve special attention, there are as many as six of them on the board. There are 3 ports of the 3.2 Gen 1 specification on the rear panel, which are up to 5 Gbps, one port of the 3.2 Gen 2 standard – up to 10 Gbps and a USB Type C Gen 2×2 port that supports speeds up to 20 Gbps. To be honest, you can get confused by USB standards that change names every year.
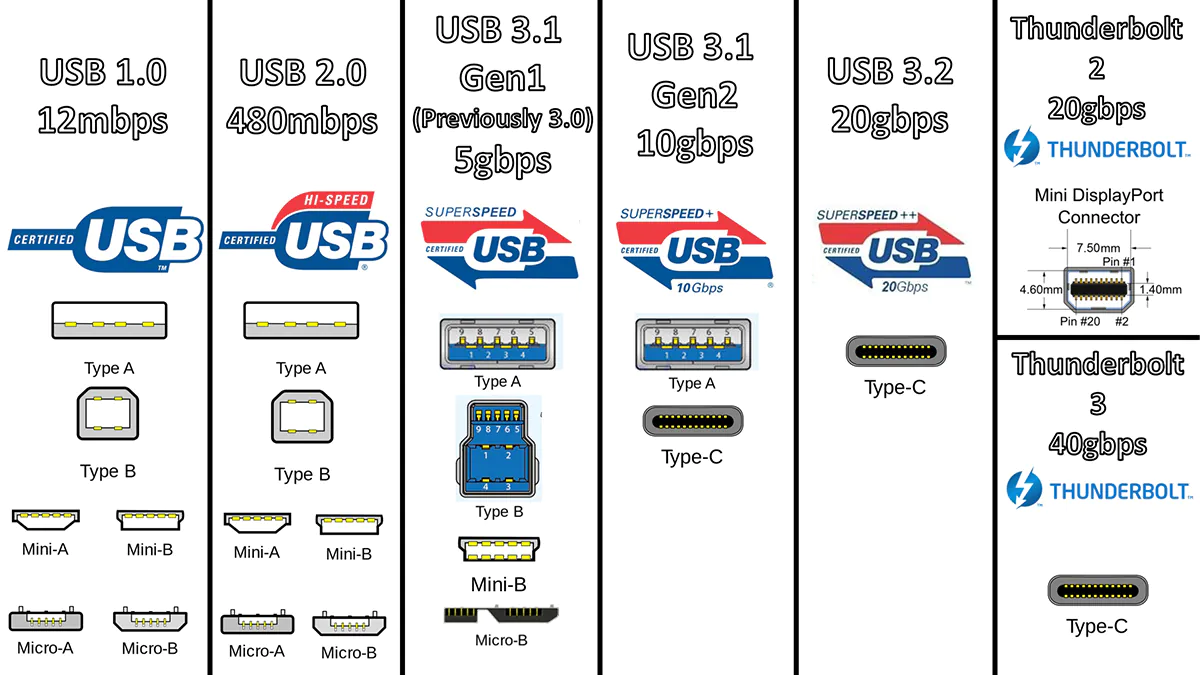
An old friend, the USB 2.0 port, is also lurking on the sidelines. It’s there for a reason, to support cool but outdated keyboards that may not work on newer ports, for example, when configuring the BIOS.
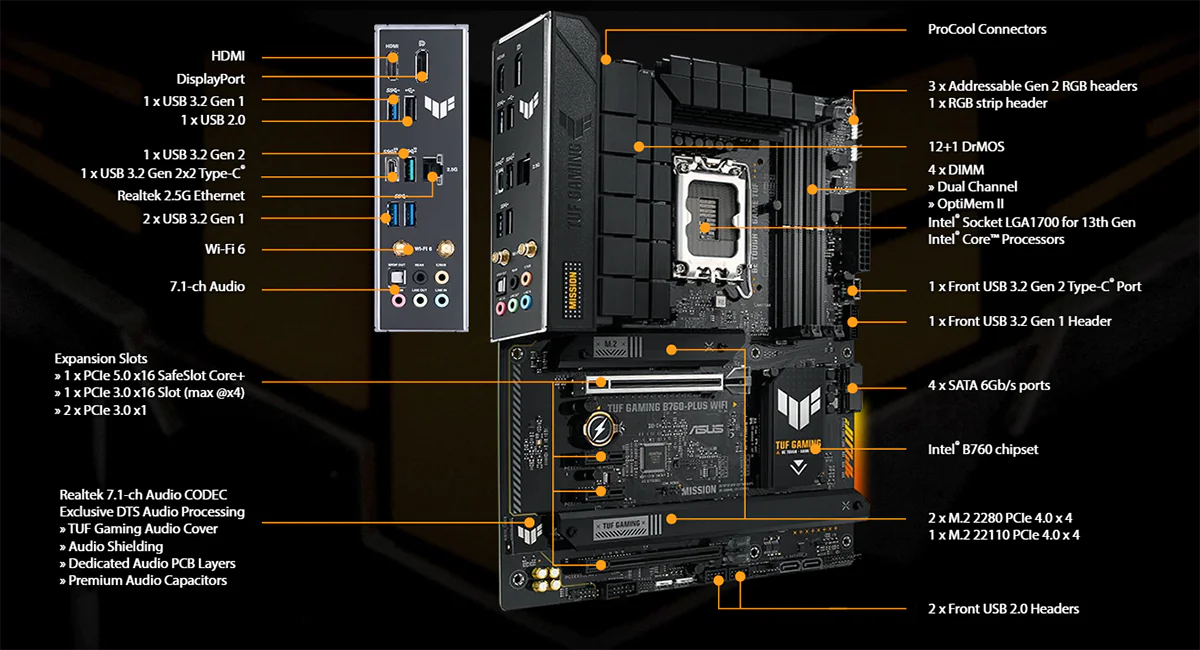
There are no interface connectors on the motherboard itself. Let’s start with the power connectors, which on our board are provided according to the 24 + 8 + 4 scheme. Not every PSU can handle it, we agree, but our board is not an easy one. In the centre of the board there is a socket for an LGA1700 processor and four slots for DDR5 RAM. There are four PCIe ports: one full PCIe 5.0 ×16 for video cards, and three cut-down ports – PCIe 3.0 ×16 (×4), 2 × PCIe 3.0 ×1. To build a disc subsystem, the board has as many as three M.2 slots operating under the PCIe 4.0 ×4 high-speed protocol and four SATA III ports. For cooling, there is a solid set of connectors – four for connecting case fans, one for a water pump and two for a CPU cooler. Of course, all of them are PWM.
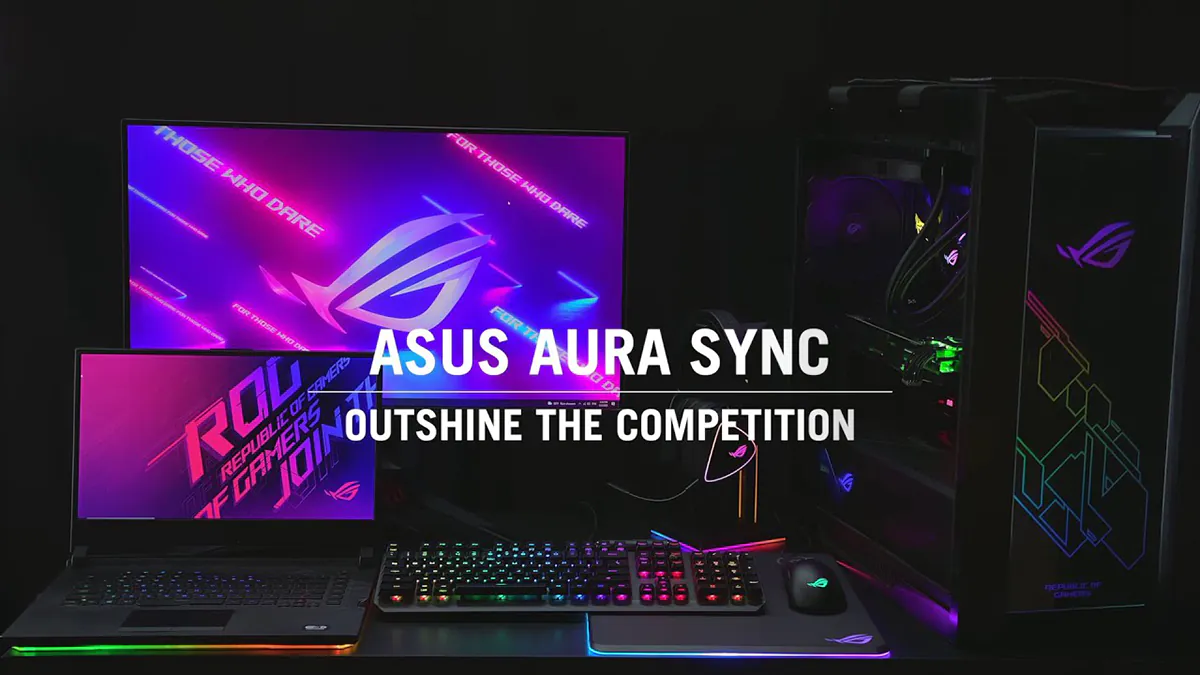
There are also plenty of connectors for connecting to the case ports. There is an output for USB Type C, USB 3.2 Gen 1 and a couple of USB 2.0. There’s even a Thunderbolt connector with USB4 support, which is very impressive. There is also a place for the audio jack on the front panel. We even noticed an archaic COM port connector on the board. We don’t even know what it can be used for in a gaming build, but it’s okay, it’s not asking for food. There are four pads for connecting the backlight, one of which is Aura RGB.
Boards options
Let’s see what this board can do. And since the box says “TUF GAMING”, it will be logical to assume that the device is positioned as a gaming one, so let’s look at the video cards. So, this motherboard will support any, well, absolutely any video card you can afford without any problems. No compromises, as they say!
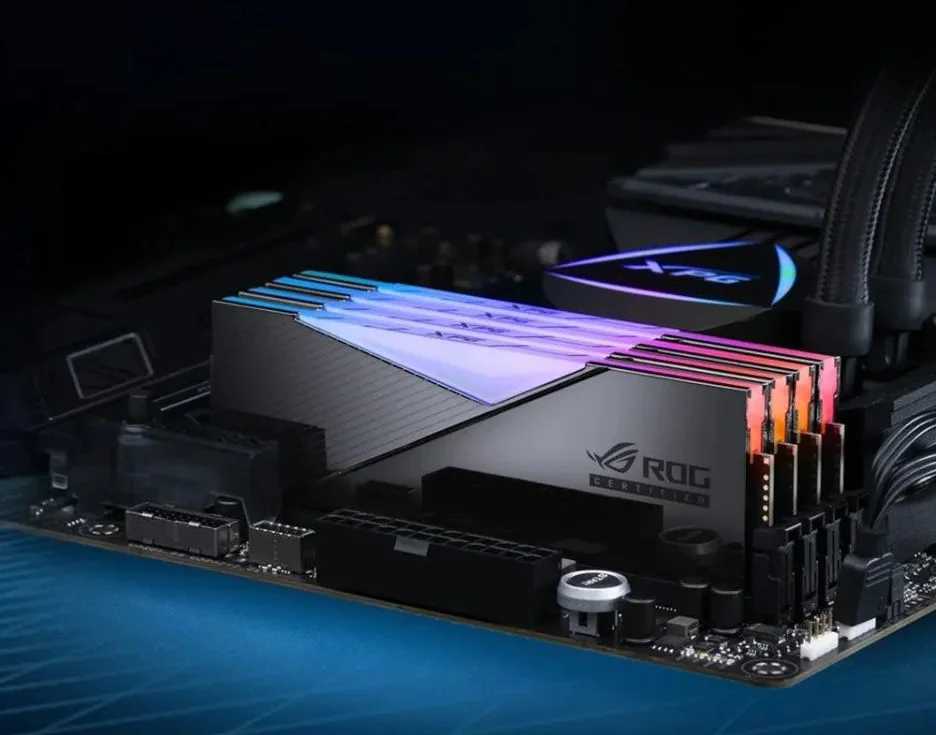
Next up is RAM. Four DDR5 slots, operating in dual-channel mode, kindly ask you to install up to 128 GB of RAM. And the memory frequency is unlimited – 6400 MHz
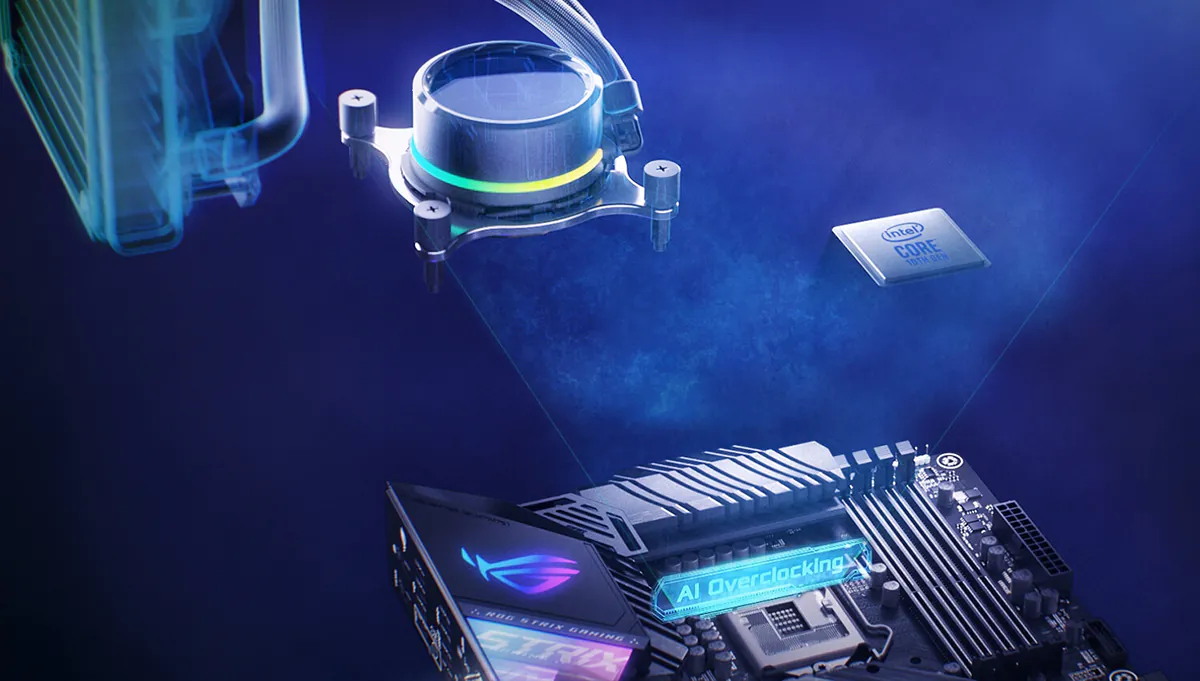
So we’ve come to the most interesting part – the processor. LGA1700 is the most advanced socket from Intel today. And our motherboard supports the latest processors on this socket without any problems. These are i9-13900K, i7-13700K, and earlier modifications of the 12th generation CPU. What do we have in the end? Absolute support for all the most modern equipment. Isn’t that a miracle?
BIOS features
Why did we need to delve into such fine-tuning at all? Experienced overclockers have long understood what’s what, but for the uninitiated, we’ll answer – “Overclocking!”
Yes, it is precisely the increase in the speed of components beyond the set one that provokes us to explore the capabilities of the BIOS. The “Ai Tweaker” settings of our board allow us to squeeze the maximum out of it. To overclock the RAM, there is both a choice of XMP profiles and the ability to manually operate the clock speed. Wide ranges of timing settings are also at our disposal. The configurator is even wider for the processor. Here we have multiplier control, independent frequency boosting for each core, and fine-tuning of the power supply. There are even a number of proprietary functions to ensure safety during overclocking.
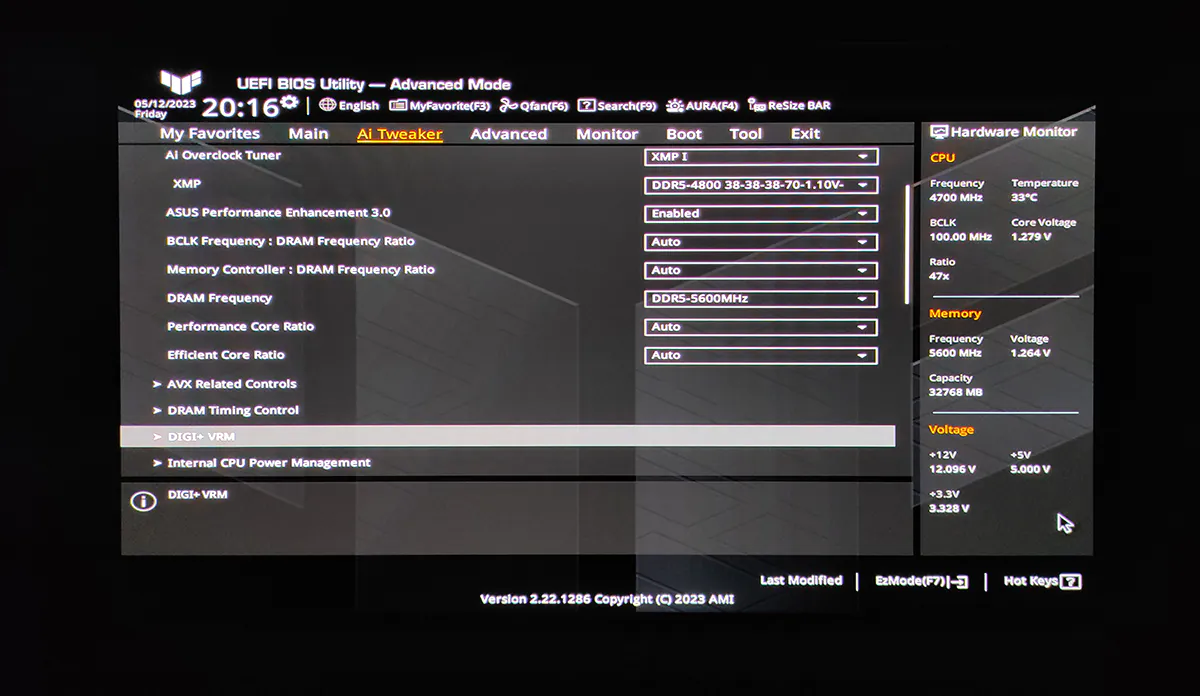
However, we want to warn you! Overclocking for inexperienced users is a dangerous task and can result in component failure. You need to be as confident as possible in your abilities and in the safety margin of your equipment.
Another interesting case of using the BIOS is fine-tuning the cooling system. Of course, it’s more intuitive to make such adjustments using proprietary utilities, but in this case, the PC’s cooling system will only work properly after the operating system boots. A malfunction may occur, and the computer components will be at risk of overheating. Professionals adjust the cooling system in the BIOS!
The B760-PLUS WIFI’s Q-Fan Control cooling system configurator is a user-friendly interface, while still having everything you need to fine-tune temperatures. Essentially, we’re given the option of setting the curve manually for each individual fan, or choosing from four standard presets – Standard, Silent, Turbo and Full Speed.
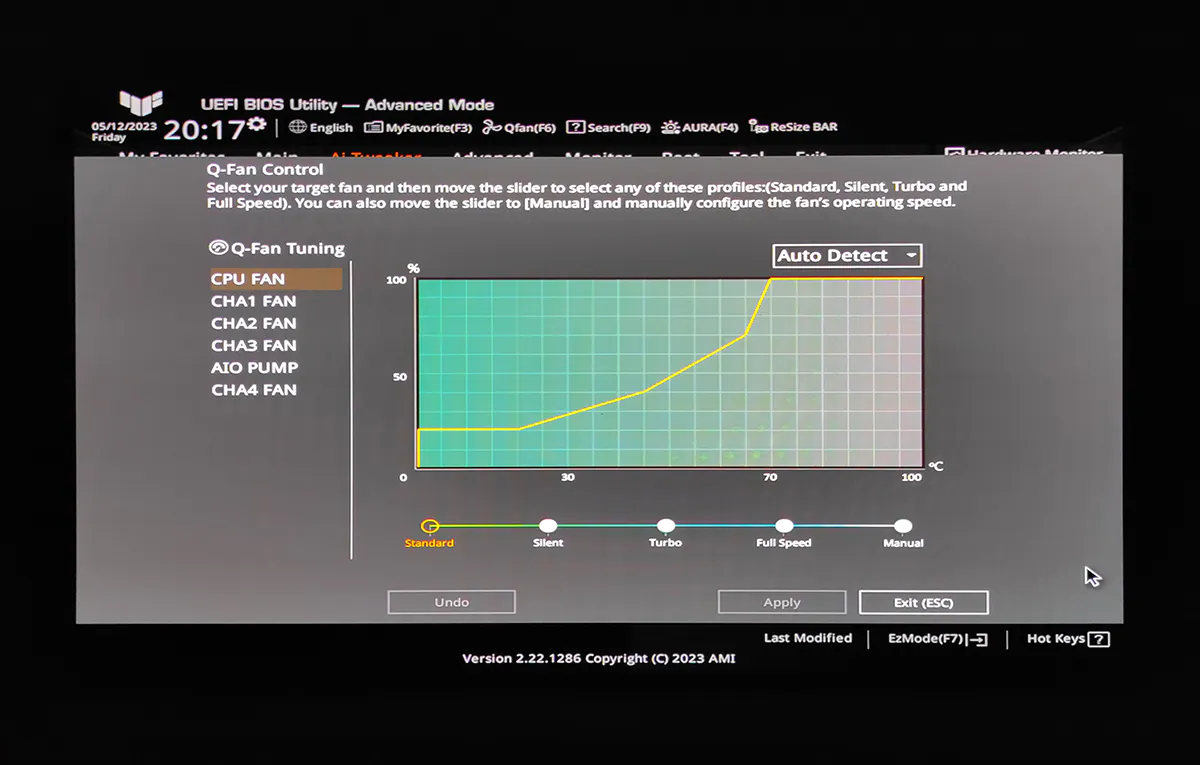
The rest of the settings are very extensive and will delight enthusiasts who want to customise their hardware as much as possible.
Fault tolerance testing
To check the reliability and fault tolerance of the motherboard, we assembled a test bench from the following components:
- Processor: Intel Core i5-13600
- Processor: ASUS TUF GAMING LC 240 ARGB
- GPU: ASUS TUF GAMING 1000G
- GPU: Kingston FURY DDR5 5200MHz 2 × 16GB
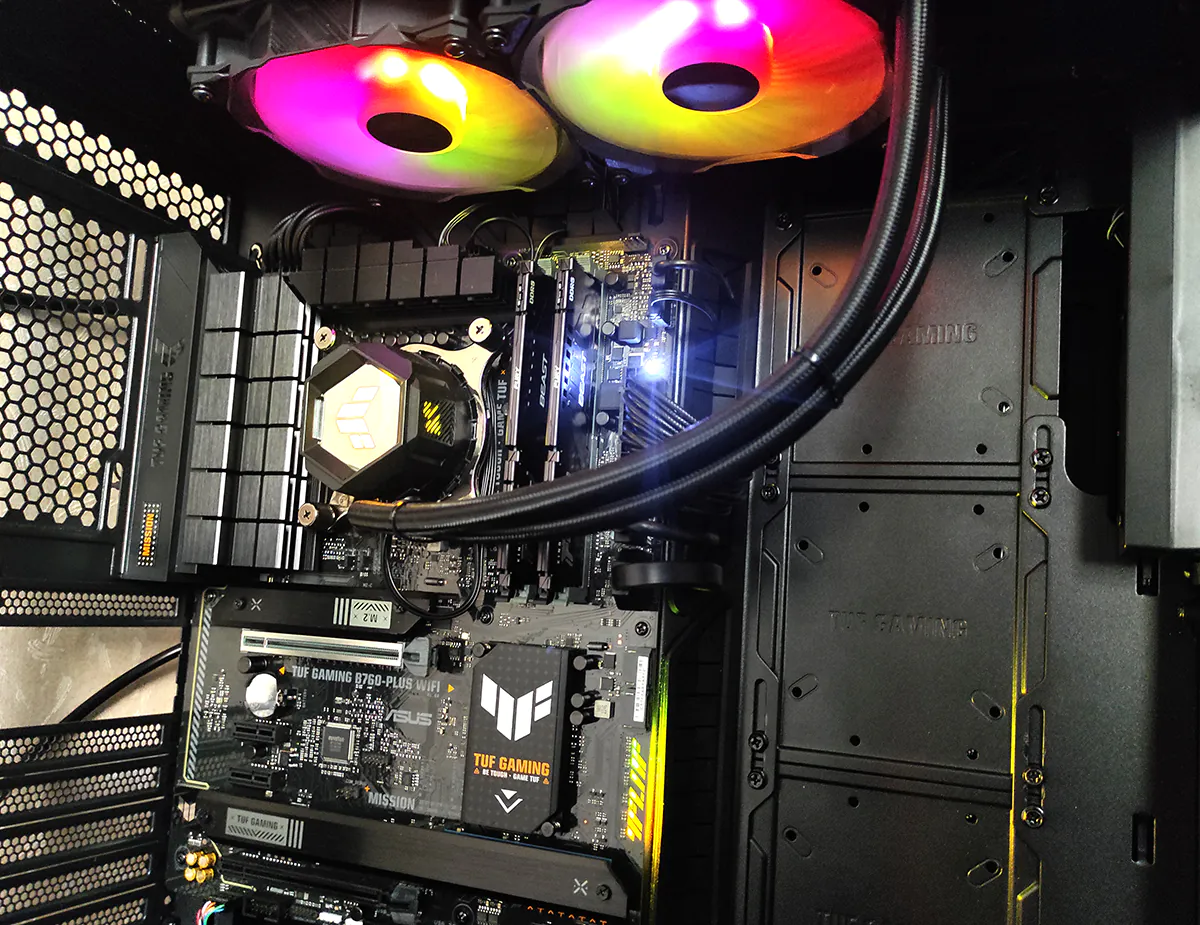
The components are packed into a large, spacious ASUS TUF GAMING GT502 chassis. The CPU cooling system coolers act as fans to remove hot air from the case. We deliberately did not install additional cooling to put more load on the motherboard radiators. As you may have noticed, there is no video card in our test bench. This was done on purpose, because a massive video adapter will additionally load the motherboard cooling system with its heat, which will give incorrect readings on the board temperatures under load.
The system was tested at a room temperature of +22°C. After running the system in idle mode for an hour, we got the following component temperatures:
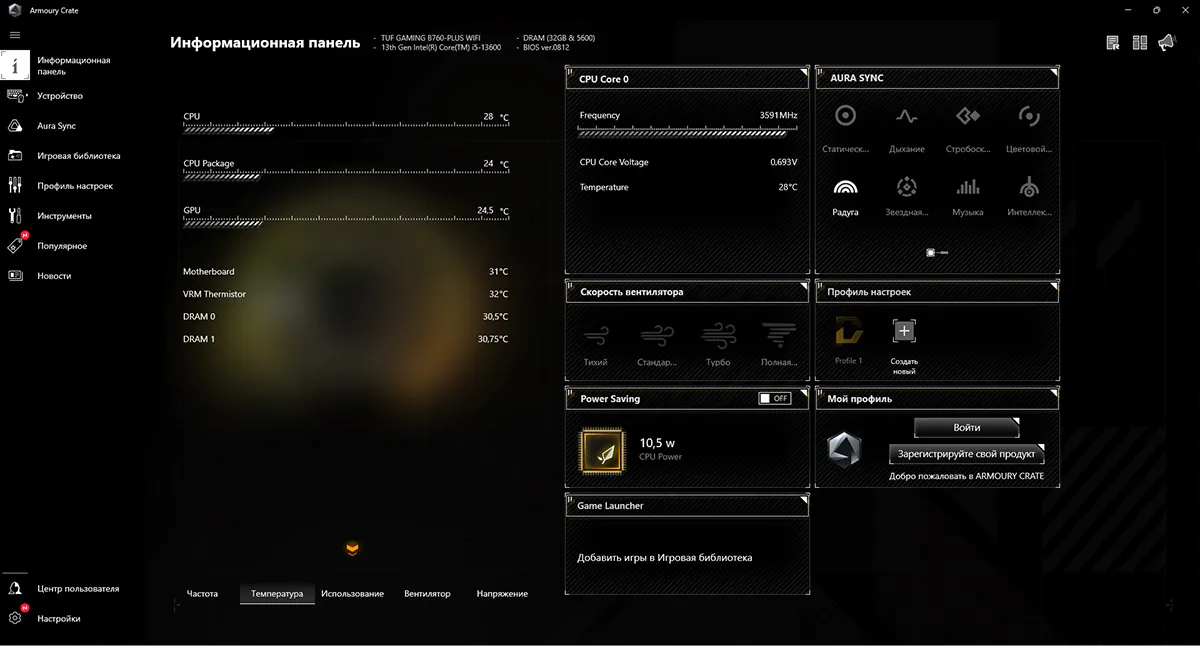
The motherboard chipset heated up to only +31°C, and the VRM temperature was +32°C. Let’s keep these readings in mind as a baseline, as they will be used to analyse the system’s heating under load.
After running the stress test in AIDA64, we waited until the temperature inside the case stopped rising and waited another 15 minutes.
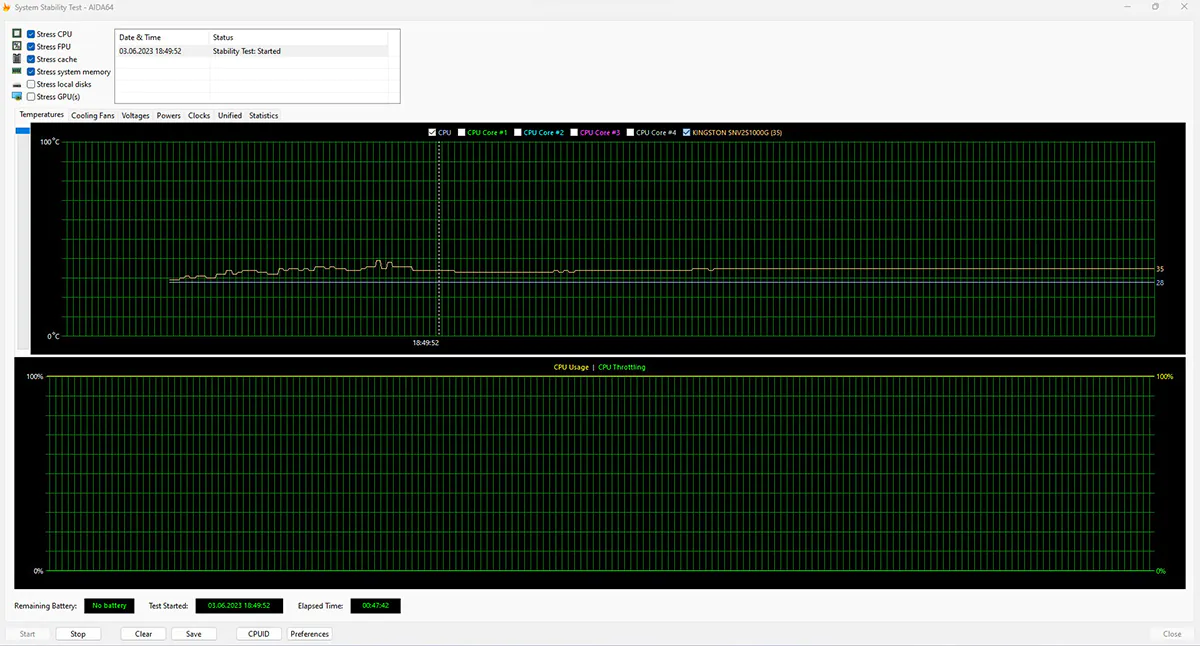
We were pleased with the temperature readings. The chipset heated up by only +2°C under load and reached a temperature of +33°C. The power supply phases were also perfectly cooled by massive radiators, with a temperature of +51°C. This is only +19°C higher than the initial temperature.
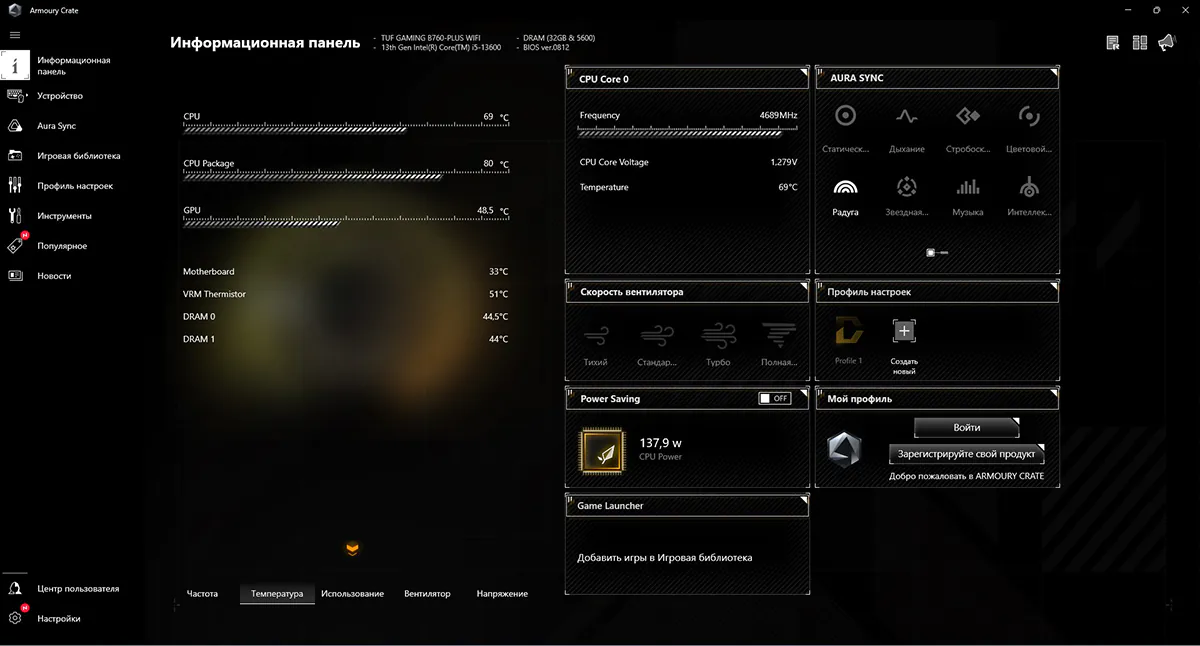
As you can see, the ASUS B760-PLUS WIFI cooling perfectly copes with maximum loads – you don’t have to worry about component failure due to overheating.
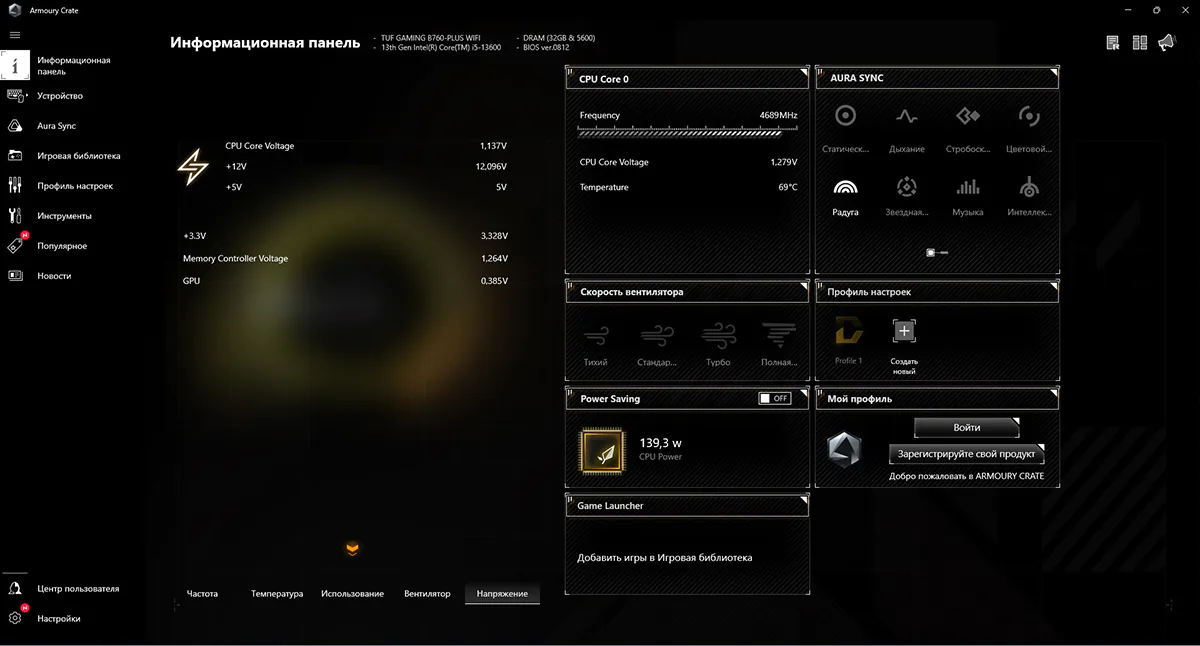
No voltage drops were noticed either. They were quite stable during testing.
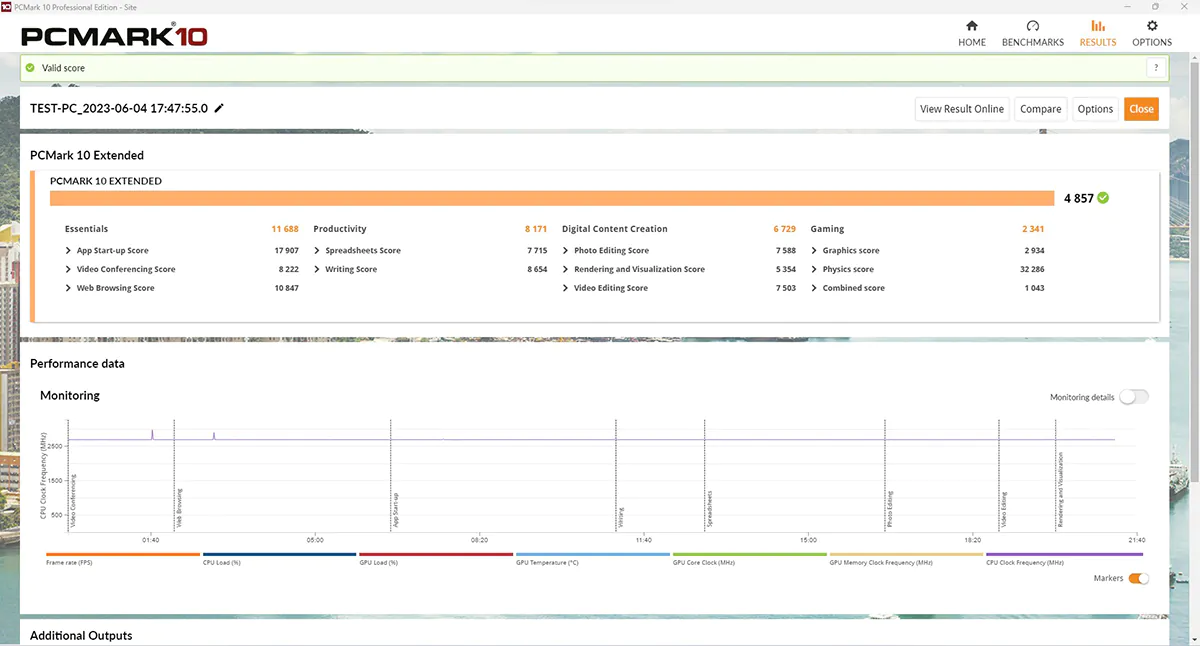
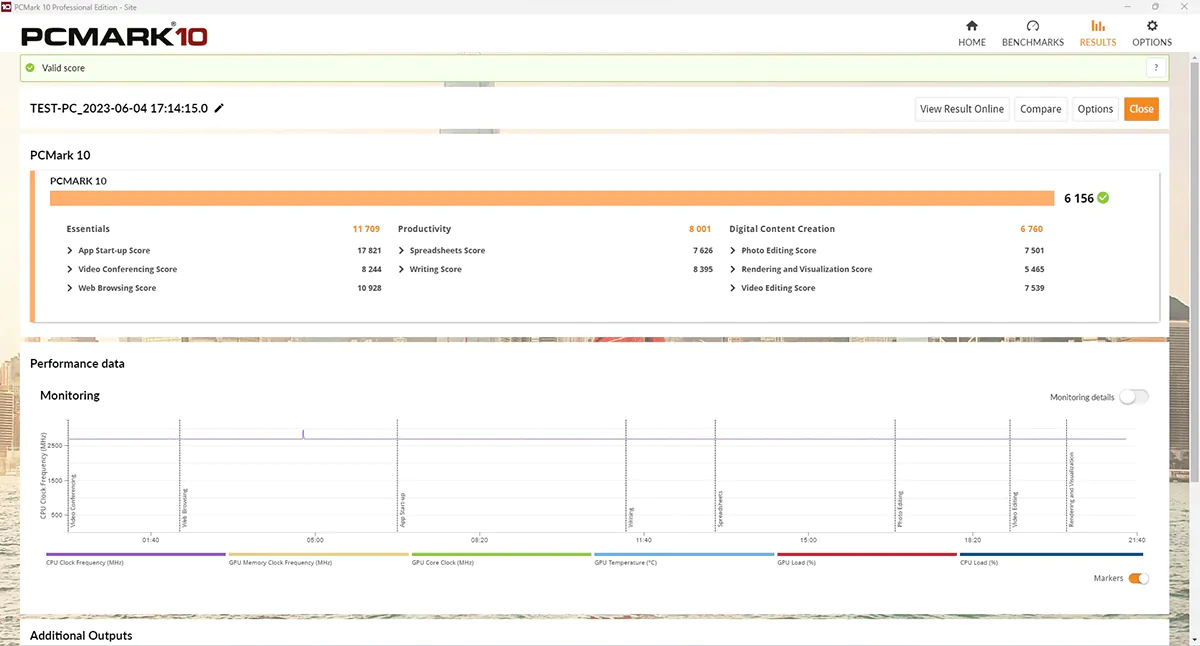
Finally, we ran our system through the PCMark 10 benchmark. In the standard test, the system scored 6156 points.
And in the extended version – 4857 points.
Proprietary utilities
Every self-respecting manufacturer releases proprietary software for their boards: for performance optimisation, fine-tuning, ease of use and customisation. ASUS has prepared some really interesting utilities for our motherboard, let’s take a closer look at them.
ASUS AI Suite 3
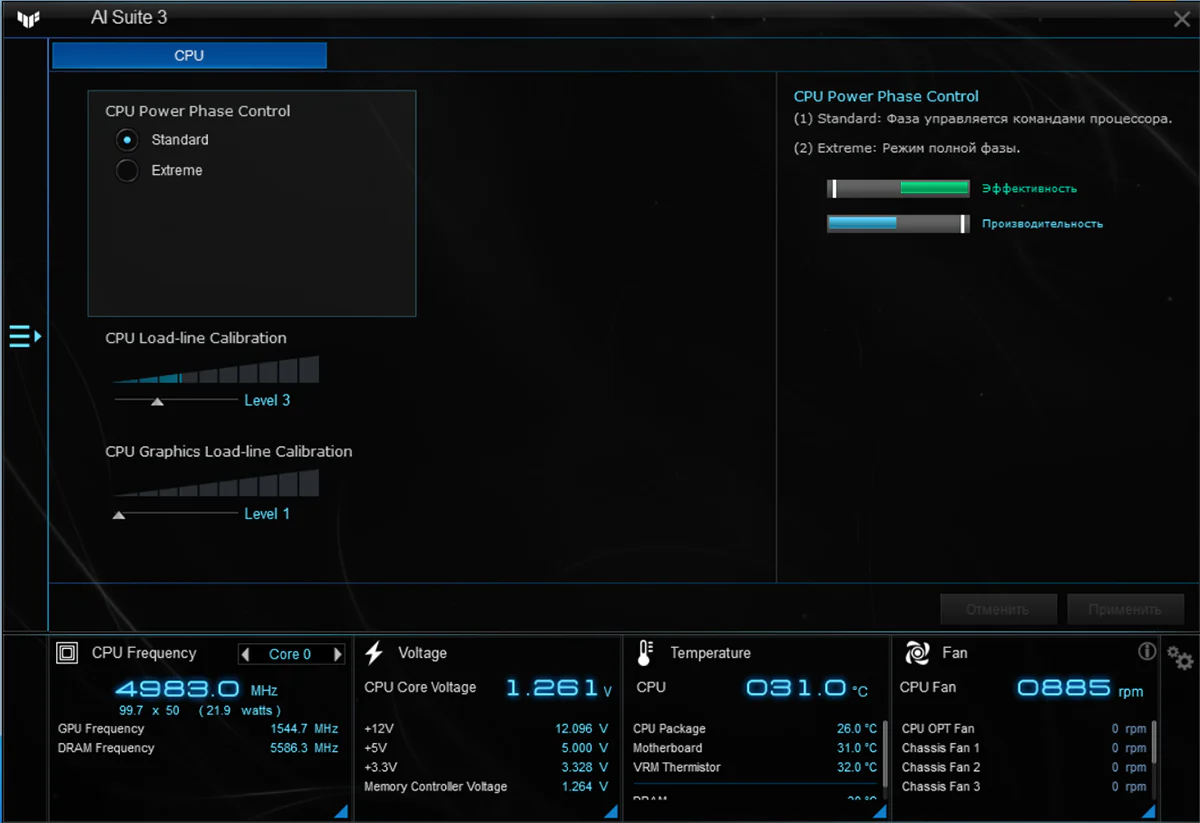
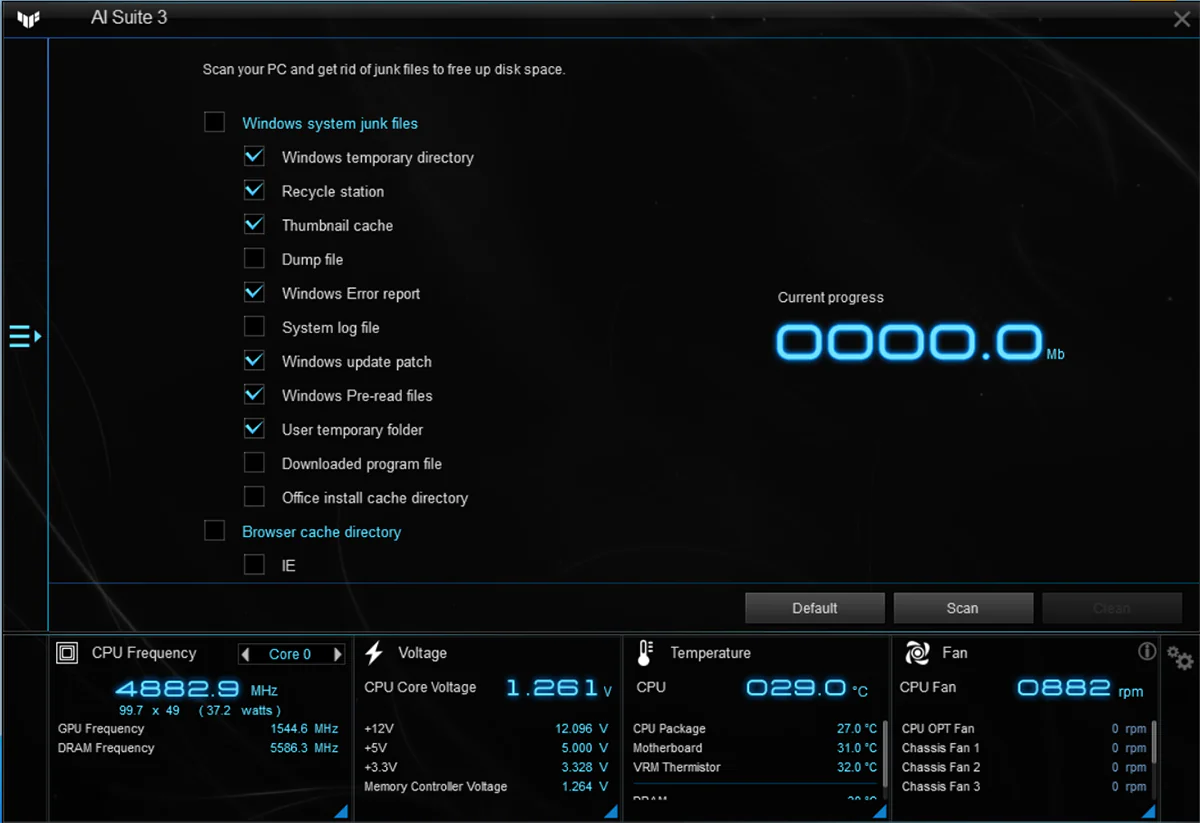
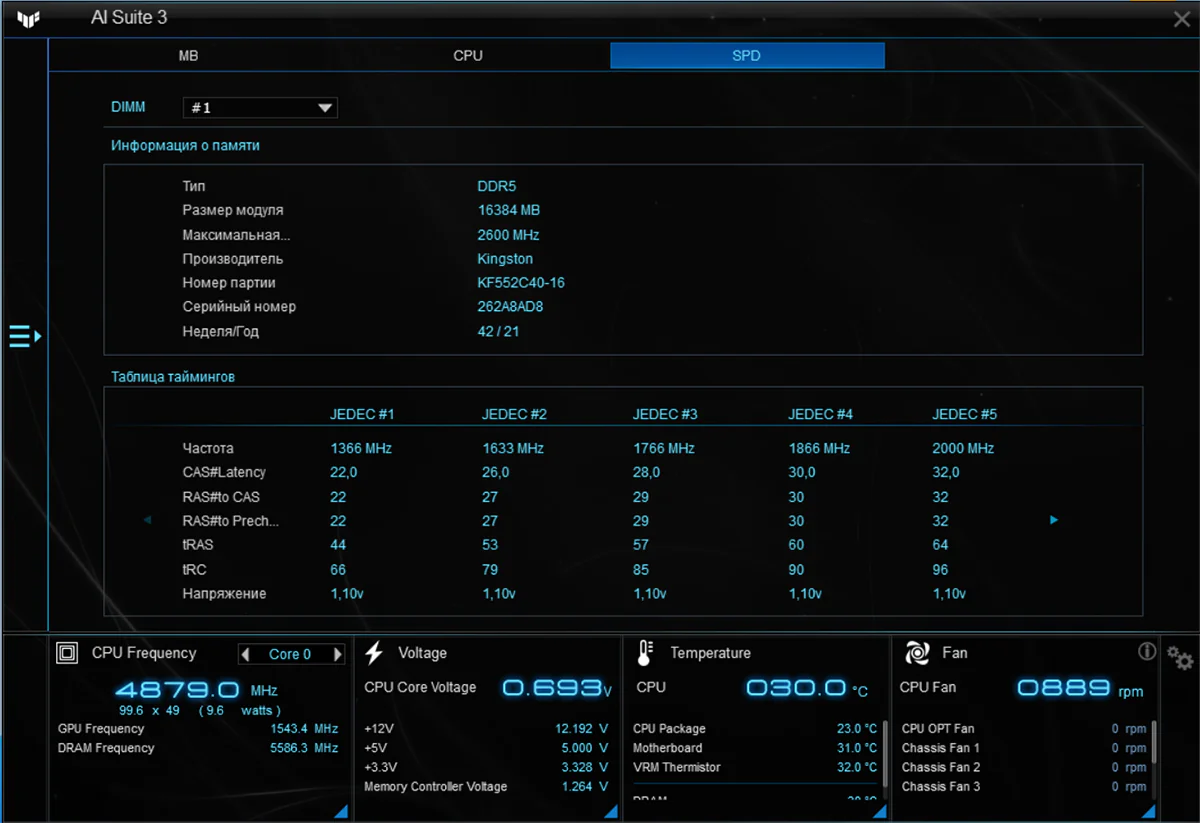
A small application for monitoring the most important indicators of PC components. Here we can monitor the frequency, supply voltage and temperature of the processor. It will also be useful to know the current performance of the RAM and cooling system. In addition, the utility is capable of cleaning the memory from various “debris”.
Armoury Crate & Aura Creator
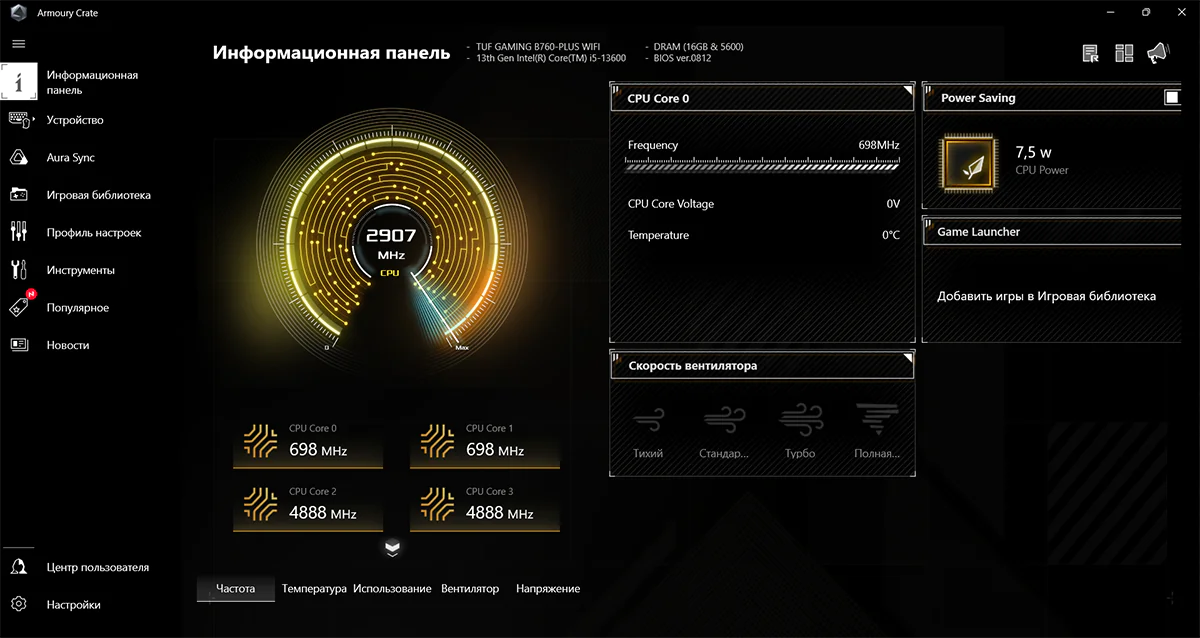
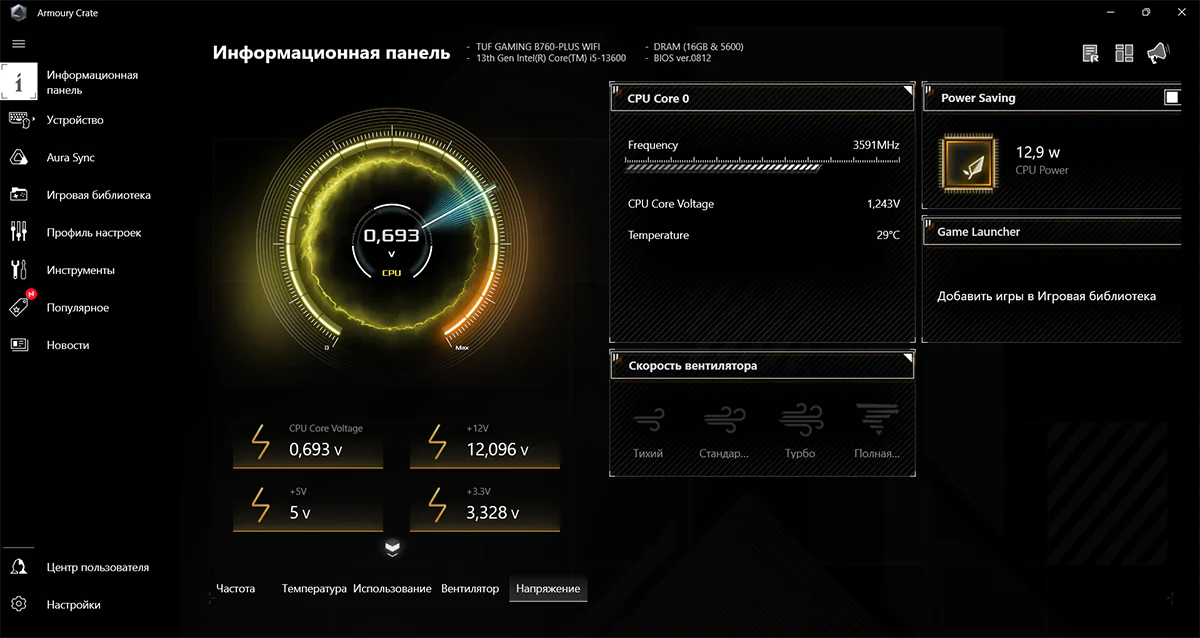
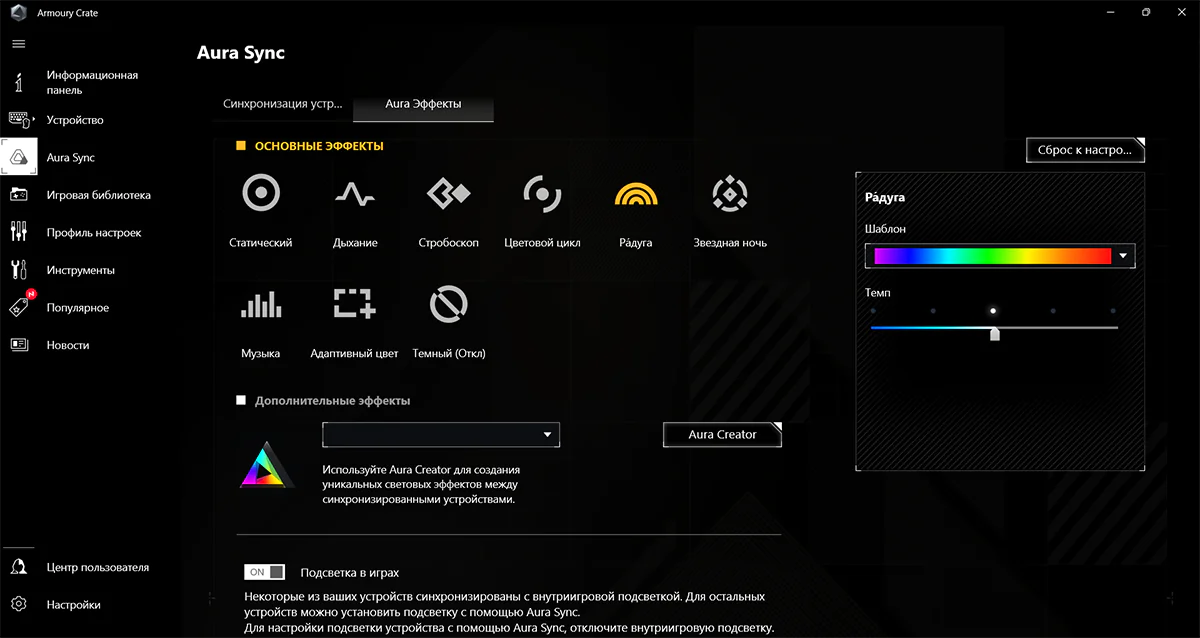
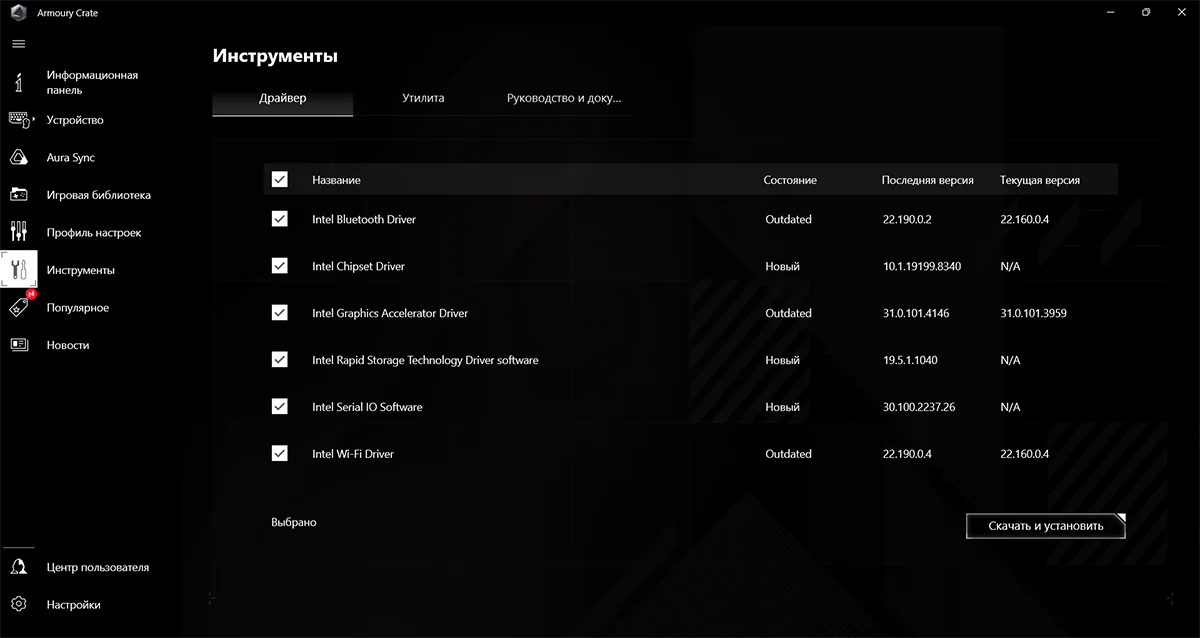
Unlike AI Suite, this utility is a real multimedia combine. It contains tools for setting up and customising your computer and has a stunning interface. On the dashboard, we are greeted with data on system parameters in the form of beautiful graphs, which can easily read the CPU frequency, system temperature and component supply voltage. The ability to control the cooling system is also useful. The Aura Sync tab is where the real magic happens! It is here that we have the opportunity to customise all the lighting available in the PC. We can choose from pre-set effects or create our own. The Tools tab will be very useful, where you can set up automatic downloading and installation of drivers and utilities. Very, very convenient!
As a manifestation of its customer care, ASUS provided us with free access to the WinRAR archiver and CPU-Z software for reading processor indicators. As they say, it’s a small thing, but it’s nice.
Read also: Be Quiet! Pure Loop 2 FX 240 Review
Summary
So what do we get for this money? A great board with a lot of modern interfaces? Of course, one of the many. Excellent component quality? Yes, but there are plenty of such boards. Support for the latest hardware? Well, any top-of-the-line motherboard can boast of that. Perhaps high-quality software? Seriously, the same is available in the budget line. The answer is really simple – we get all of the above, but at the price of mid-range boards. An excellent motherboard with top-end features, ready to become the basis for a serious gaming PC. ASUS B760-PLUS WIFI is a worthy choice for a worthy PC!


