© ROOT-NATION.com - Use of content is permitted with a backlink.
Have you ever dreamed of easily transferring images from your imagination to paper? Now you can, thanks to image generators like Midjourney.
Whether you are a talented artist or have no experience with a brush, you can now create masterpieces. That is, thanks to artificial intelligence, you can create images in a few minutes that used to be only in your head. Just describe them in words and the picture will be ready in a moment. All this is thanks to an interesting service called Midjourney that creates images generated by artificial intelligence. Intrigued? Then let’s find out more about what Midjourney is, how it works, and all the most important information about this AI tool.
Read also: The war for satellite internet: Europe challenges Starlink
Midjourney: what is it?
Images created by artificial intelligence are becoming more and more common on the Internet: from Pope Francis in a brightly coloured jacket to Wes Anderson-inspired film posters. It’s easy to see why – modern AI tools have become so convincing that the photos they create have even won prestigious photography awards.
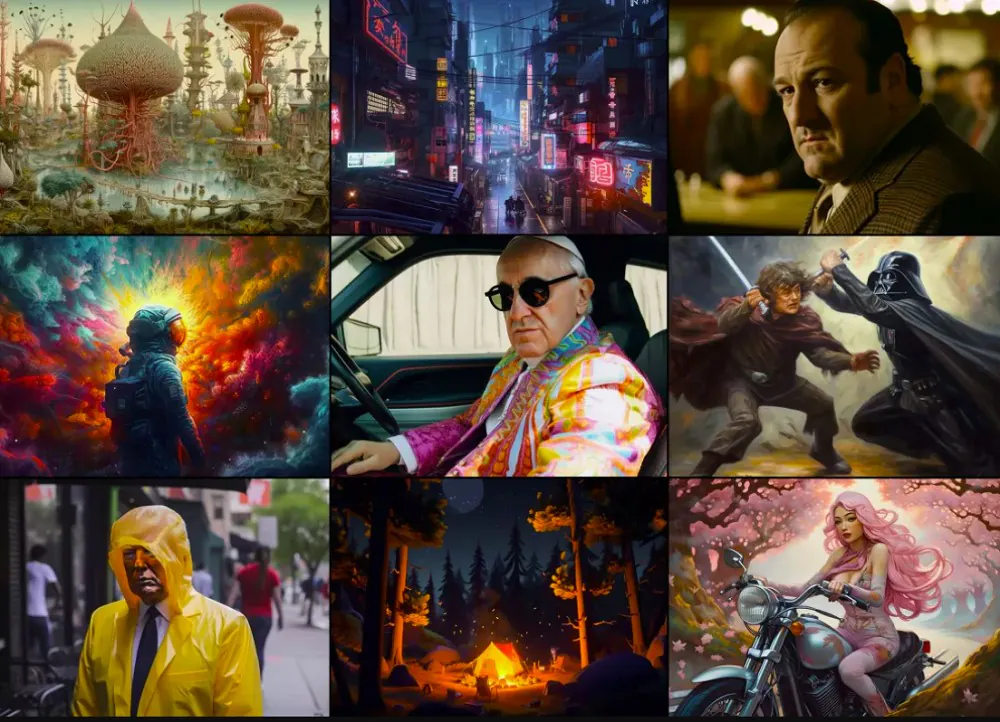
Midjourney is an example of generative AI that can create graphics based on textual instructions. It is just one of many machine learning-based image generators that have recently emerged. Despite this, Midjourney has become one of the largest and most popular AI tools of this type, along with DALL-E and Stable Diffusion.
You don’t need any special hardware or software to use Midjourney, as it works through the Discord chat app. The only drawback? Yes, there is one. It’s the need to pay a certain amount to start generating images, which sets Midjourney apart from most competing solutions that often offer at least a few free image generators.
That said, using Midjourney is extremely easy and accessible to anyone, as the cost is not too high and the results can be truly stunning.
Read also: All about the new MuWNS navigation system: Works underground and underwater
The history of Midjourney
Unlike DALL-E, which is backed by Chat developer GPT, Midjourney describes itself as a self-funded and independent project. The service was founded by David Holtz, who is also the co-founder of Leap Motion, a well-known virtual and augmented reality startup that was acquired by UltraHaptics in 2019.
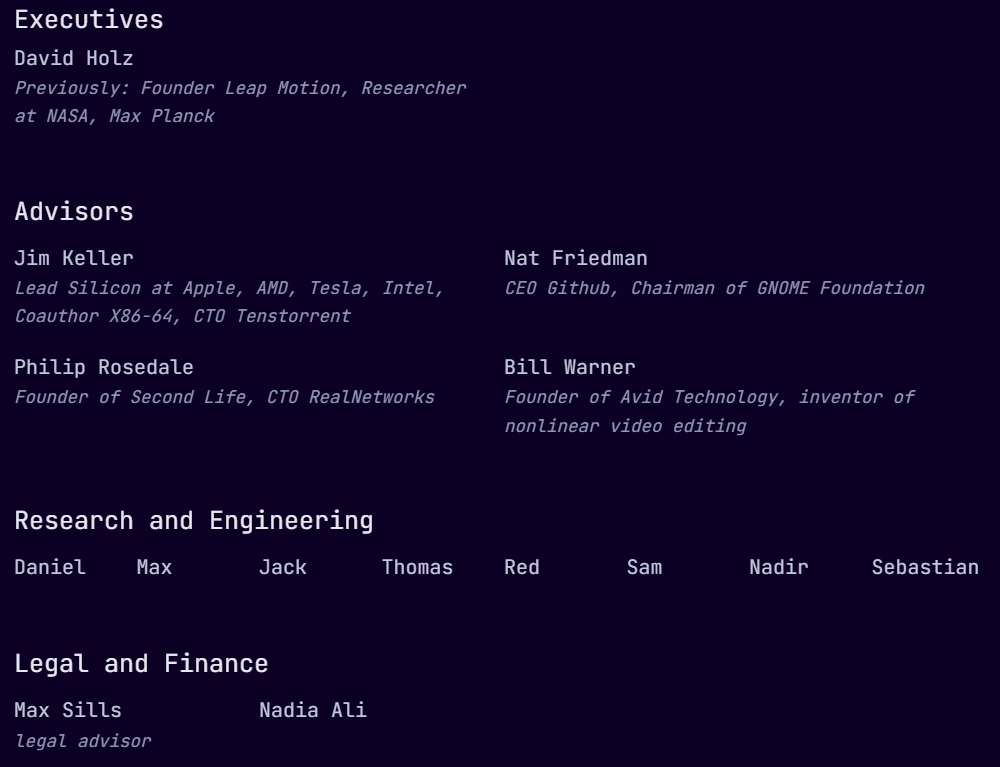
The Midjourney team includes prominent figures such as Jim Keller (processor engineer at Apple, AMD, Tesla, Intel, and co-author of x86-64), Nat Friedman (CEO of Github and chairman of the GNOME Foundation), and Philip Rosedale (founder of Second Life).
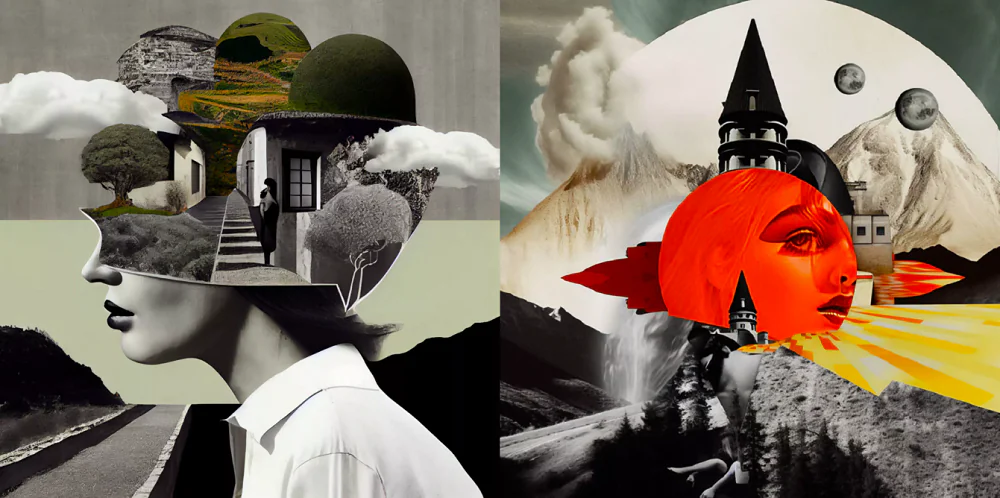
The AI development of Midjourney text and images began in closed beta, which was then moved to open beta in July 2022. This allowed the public to access and use the tool. It was this move that helped Midjourney gain popularity. Unlike other AI tools, Midjourney was profitable as early as August 2022, which confirmed its success in the market.
Read also: How Taiwan, China and the US are fighting for technological dominance: the great chip war
How to use Midjourney?
Using Midjourney may seem a bit complicated at first. Moreover, the creators decided on an unusual solution. Namely, instead of a special application for generating images, we get a link to a Discord bot called Midjourney Bot. So, let’s take a look at all the steps you need to take to create a graphic using the Midjourney tool.
Sign up for Discord
To get started with Midjourney, you must have a Discord account. Discord is a chat application somewhat similar to Slack. Although it was originally developed for players who need to coordinate tactics while playing multiplayer online games such as League of Legends and World of Warcraft, it is now extremely popular among other communities.
So, as you can see, before you can use Midjourney, you need to create a Discord account. It’s free. Visit the Discord page to sign up. From there, follow the steps as they appear. If you already have, or have just created, a Discord account, you can skip to the next step.
Sign up for Midjourney
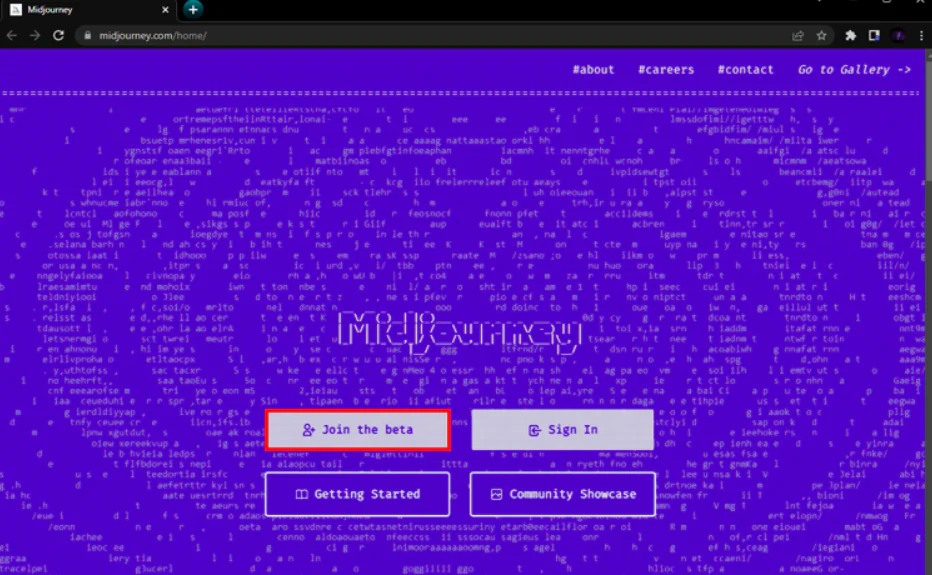
Once you have set up your Discord account, go to Midjourney and click “Join the beta”. This will open an invitation to join the Midjourney Discord channel. Click “Accept invitation”.
As a free member, you will not be able to create images, but you can browse the interface. You can also see the creations of other users by visiting different rooms (called #newbies-14 and #newbies-21) to understand how Midjourney works.
Subscribe to Midjourney
To start generating images with Midjourney, you’ll need to purchase a subscription. To do this, visit Midjourney.com/account, sign in with a verified Discord account, and choose the subscription plan that suits your needs. We’ll talk about the prices of individual plans later in the text.
Join the Midjourney Discord server
Once you’ve joined the Midjourney Discord server and signed up for a plan, you can start generating images. Follow these steps:
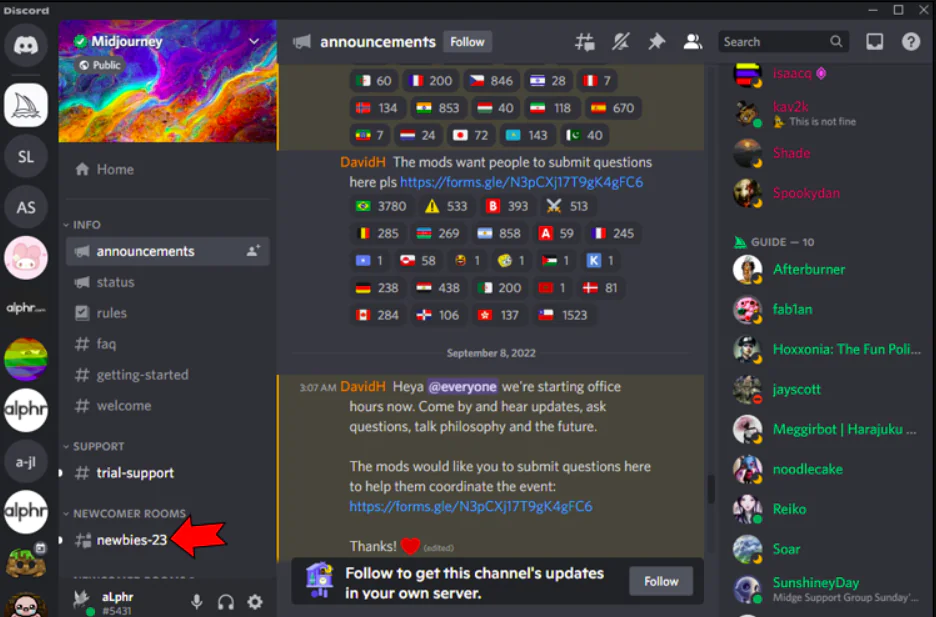
- Open Discord and make sure you select the Midjourney server from the menu on the left.
- You should see a long list of channels on the left side of the screen.
- Select one of the channels that starts with “newbies”. You may have to scroll down the list to find it.
- You can scroll through the feed to see what prompts other users have used to create images.
How to generate teams
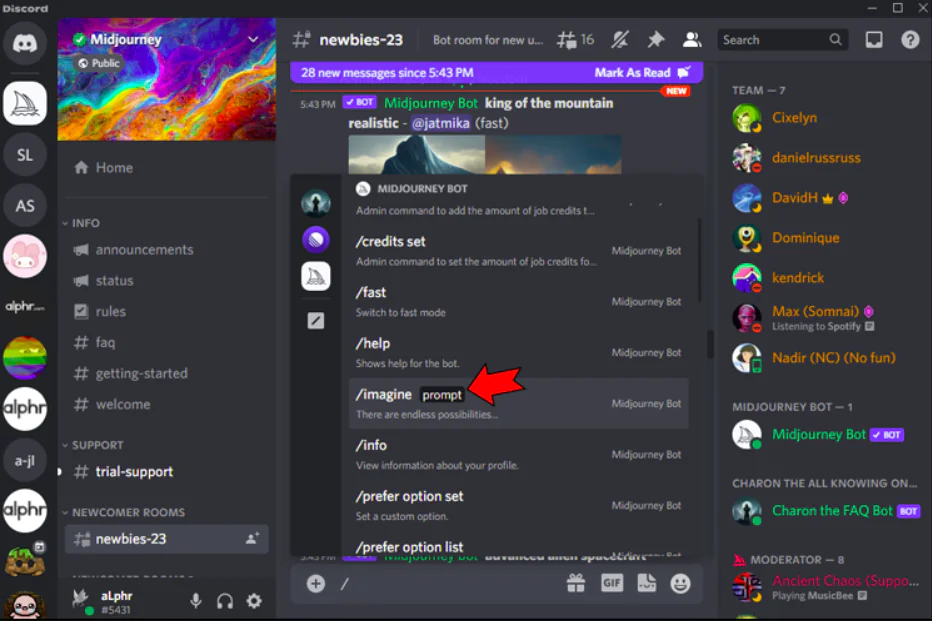
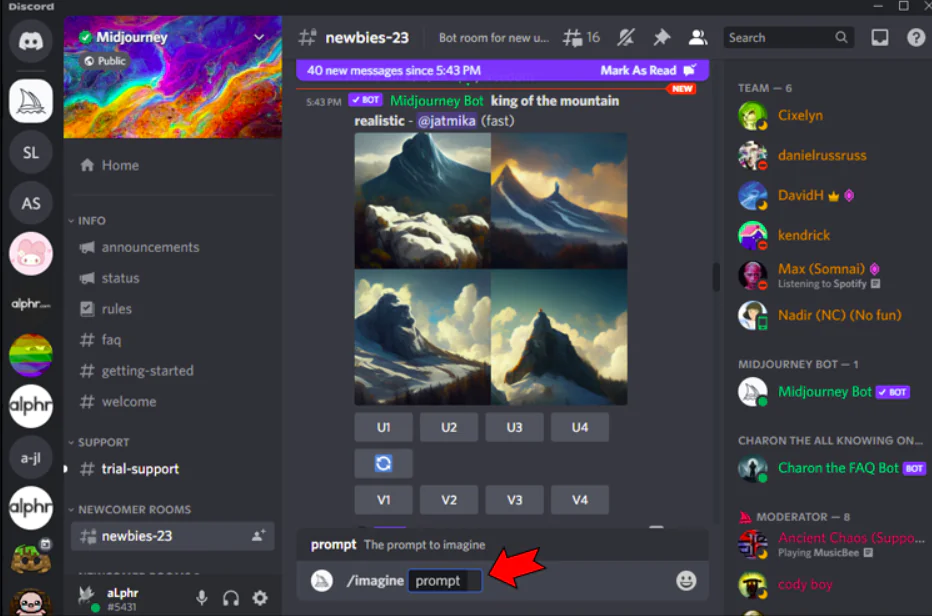
In a beginner channel or your own channel, type “/imagine” followed by the instructions. To start a private chat with a bot, find the Midjourney Bot icon in the list of users on the right side of the screen. Right-click on it and select Send Message or Message.
Be as specific as possible in your description to give the AI enough information to create the right image. For example, you can include details such as style, genre, mood, and other elements to help AI create the image you envision. You will read more about this later in the text.
Read also: 7 coolest ways to use ChatGPT
How to create effective prompts in Midjourney
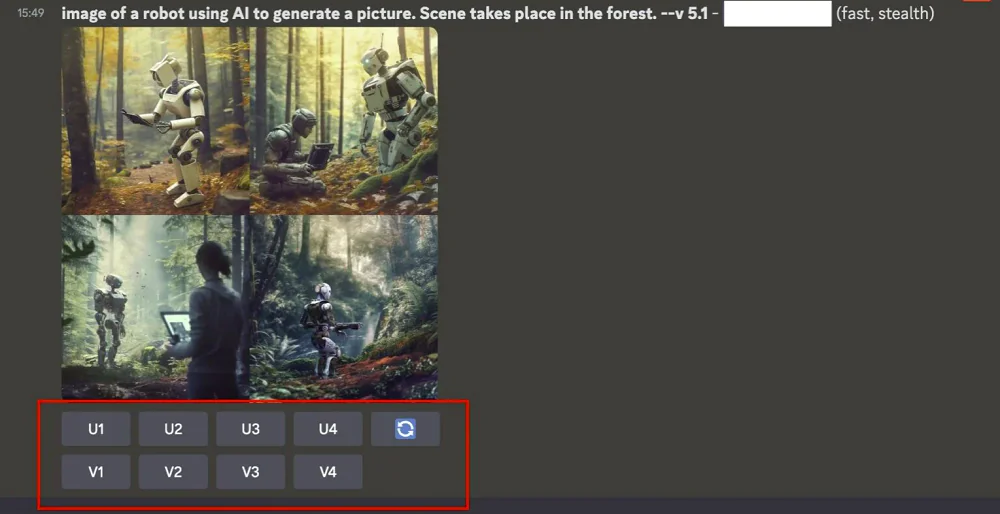
Anyone who has used Midjourney knows that the better you describe the image you want to get, the more vivid and unique the result will be. Users usually use short and direct prompts. For example, after providing a simple instruction like “the robot uses AI to create graphics”, Midjourney will create, among other things, something like this:

As you can see, such simple instructions are not enough (or at least not always) to get the desired results, so the key to success is to write the perfect explanatory tooltip.
Do you like the style of a particular artist? Do you want your graphics to be made in the style of another era? Or is there a specific technique you want the image generator to use? All of this can be achieved. Artificial intelligence is a trained system that has countless source images to create the perfect graphic from. The only thing you need to take care of is to provide the AI with the best possible description of what you expect from it. But how do you do that? Fortunately, we know the answer.
Punctuation
Most of the punctuation you use in your prompts will not be recognised by Midjourney. The only punctuation that Midjourney understands is:
- Parameters are separated by double hyphens, for example, “–ar 16:9” or “–v 5”.
- A double colon separates integers, both positive and negative. For example, “::-0.5”.
- Spaces are the main character that separates lexical items.
Structuring Midjourney prompts
First of all, remember that in Midjourney, prompts should be written in English, so that the programme understands them better. Each prompt starts with the /imagine command and should contain a description of what you want to get. It is good to give your prompts some structure. It is not necessary, but it is certainly very helpful to get the desired graphics as quickly as possible and to easily change them if necessary.
In the first part of the description, include all the elements that best describe your image. For example, you can ask Midjourney to emulate a certain artistic style by suggesting that it be used as a basis. Example: “Image of an elephant in the style of Van Gogh”:

What’s really interesting about Midjourney, however, is its ability to reproduce images that look like photographs. To achieve this, you need to consider several things. For example, you can choose the type of camera the AI should emulate: SLR for film cameras and DSLR for DSLR cameras. You can also suggest a lens type (18, 35, 50, or even 250 mm) and a specific camera model.
Additional commands can then be made. These must be preceded by a “–” and allow you to direct the AI to focus on specific aspects, such as the Midjourney version (v 4, v 5), image format (3:2, 16:9, etc.), or style setting (s 100 for medium, p 250 for high, or p 750 for very high). Low values for the style setting produce images that closely match the prompt, but are less artistic. Higher values produce much more artistic graphics, but less related to the prompt.
A complete list of options and commands is available on the Midjourney website.
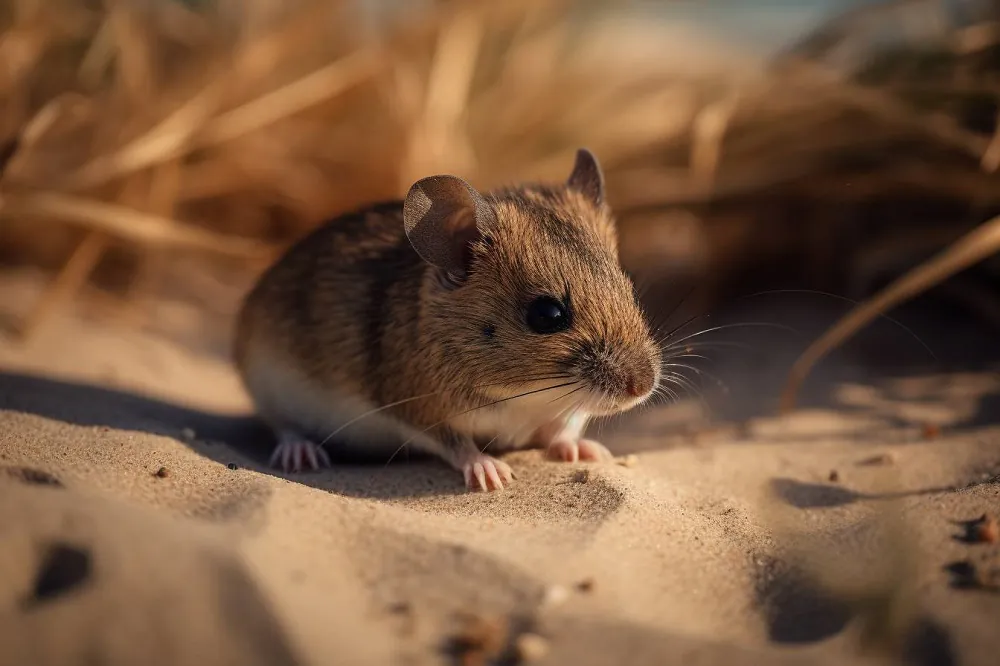
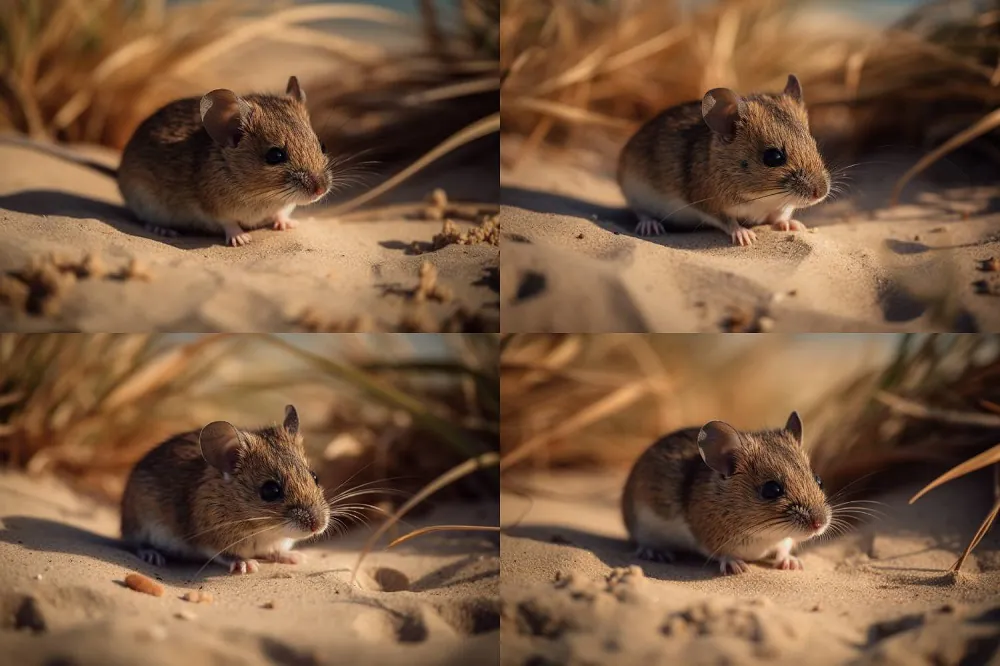
Here is an example of a tooltip and the resulting graph:
image of a sweet little mouse lying on the beach. Photo with a Canon R5, 50mm, DSLR, –v 5 –ar 3:2 –s 750
Lighting, environment, angle – think about every detail
To give your photos context, place the objects you’ve created in a specific environment. Midjourney lets you make incredible scenes look ultra-realistic. You may want to place your character in a house decorated in a certain style, on the beach, or on the streets of a certain city.
Another aspect worth paying attention to, as it brings great effects, is light. No one needs to be convinced how important it is when taking photos. The same goes for AI graphics, which often look very similar to real photos.
Depending on the time of day, the lighting varies. Therefore, the colours and contrasts in the photos vary. Midjourney is able to reproduce these contrasts. For example, you no longer have to wait for the sunset, just ask for a specific photo by adding the word “golden hour”.
Another factor you can play with is the angle of the image. In some cases, this requires adjusting the optics, which can make a big difference to your graphics.
Here are some examples of angles that you can include in Midjourney prompts: for distant shots, you can choose Wide Angle, Ultra Wide Angle, Long Range, Aerial or Satellite, Eye Level, and Close Up; for close-ups, you can choose Up, Glamour Portrait, Macro-Shot, or Macrophotography.
Here is an example of a request and its result:
a handsome man walking the streets of Los Angeles, golden hour Photo with a Canon R5, 50 mm, DSLR, –v 5 –ar 3:2 –s 750

Edit images with zoom and dispersion
Under each set of generated images, you will see eight buttons: U1, U2, U3, U4, V1, V2, V3, and V4. All of these buttons allow you to fine-tune and better control the type of images you get from Midjourney.
If you are using a version earlier than V5, the U buttons will be used to zoom in, i.e. resize the original image, creating a new, larger version with additional detail. They are numbered U1-U4, which are used to identify the images in the sequence. For example, if you want to zoom in on the second image, click the U2 button in the top row. The latest models create 1024×1024 pixel images by default, so the U buttons simply highlight them for further editing and easier saving.
There is a Re-roll button on the right-hand side of the first line. This is a great tool if you’re not happy with the first set of images Midjourney created for you. Click this re-create button to ask Midjourney to try a different concept based on the original request, and you will get four new images.
The V buttons create four new variations of the selected image, matching them in style and composition. When choosing between V1 and V4, you can select the button that corresponds to the image you want to create variations for.
Last but not least, the /describe function
Finally, I’ve left a great command that will make it much easier for you to create the perfect prompt. It’s the /describe function, which allows you to upload your own image and generate four possible queries based on that image. How does it work? After you type /describe, a window will appear to select a photo from your computer’s disc. Choose a suitable image file, upload it to the server, and Midjourney will offer you 4 text suggestions with its description. Below is the description of the photo I sent:
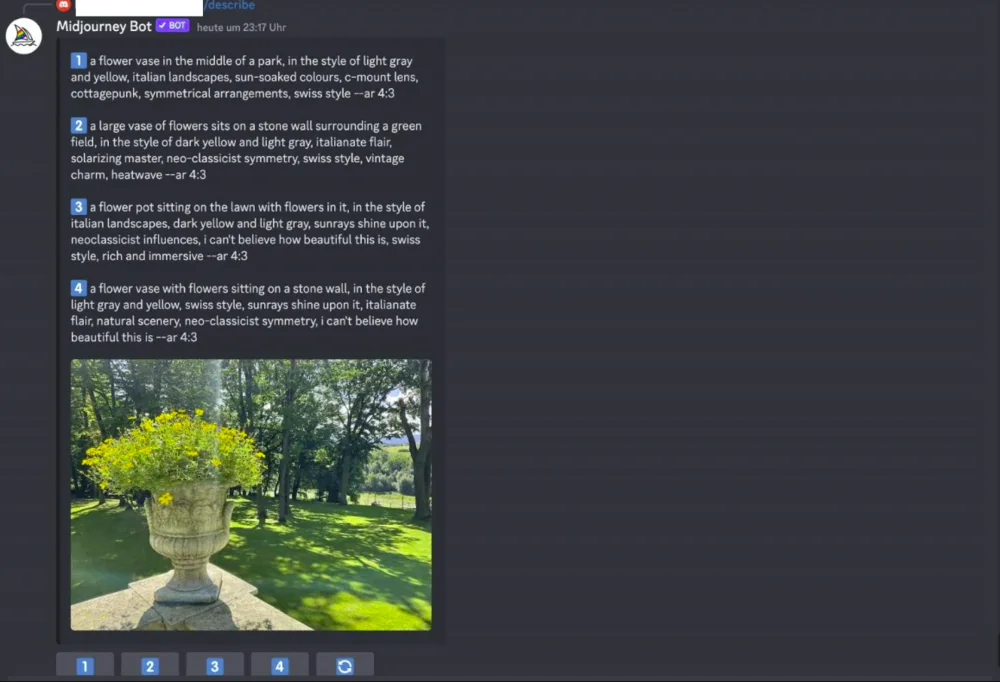
As you can see in the screenshot above, for each of the four descriptions, there are buttons that allow you to use the tooltip generated by Midjourney. After selecting an image, a text box appears with the selected description. At this point, you can decide whether you want to edit the text or leave it as it was created.
If you want to get the best results, I suggest expanding the description as much as possible and just use the text generated by the app as a basis. After clicking the “Send” button, simply accept the invitation and send it to Midjourney. After a while, you will receive a reply with sample images:

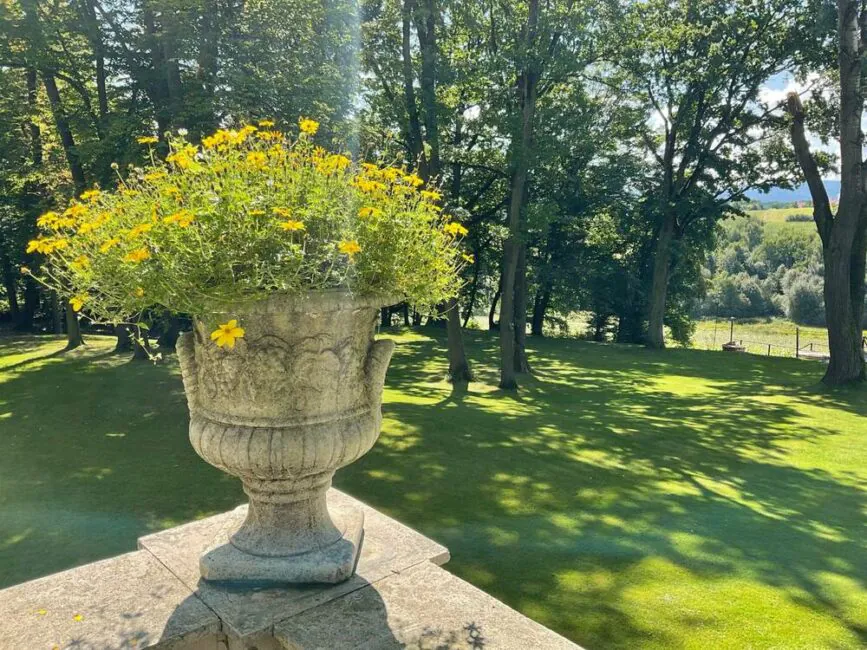
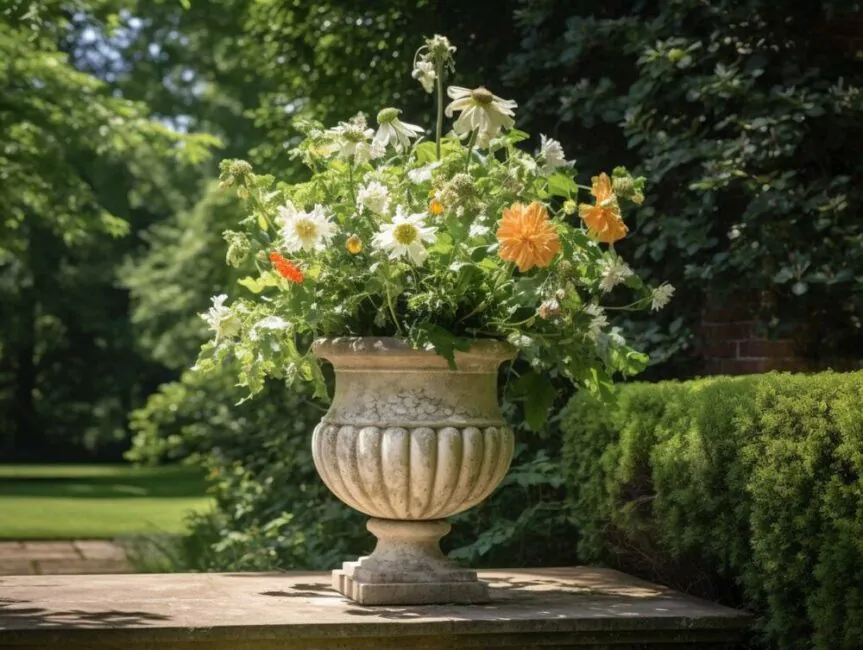
For comparison, below is the photo I uploaded as an example and the photo I chose from the proposals presented:
Read also: Chinese space station Tiangong: Everything we know so far
How much does Midjourney cost and can I use it for free?
While we’re used to chatbots like ChatGPT and Bing Chat offering almost unlimited free use, the same cannot be said for image generators. Almost all of them have some restrictions, and Midjourney is no longer free, except for a few short promotional periods.
When the service first launched in July 2022, anyone could use it to create 25 images for free. All you had to do was create a free Discord account and join the Midjourney server. The free trial was activated as soon as you sent your first request. However, when you reached the 25-image limit, you had to upgrade to a paid plan.

That all changed in April 2023, when Midjourney’s CEO announced that the free trial programme would be suspended. Over the past year, Midjourney has become very popular, and users are eager to share the graphics they create on social media. Why did the creators decide to take this step?
The decision to abandon the free version is easy to understand. Every image creation task requires a lot of computing power, especially graphics processing units (GPUs). In addition, each GPU has limited video memory, which is used in large volumes for the noise reduction process.
More precisely, image generators use power-intensive GPUs, which not only cost a lot of money but also exist only in limited quantities. Therefore, in order to maintain the quality of the service, the company has suspended the free trial period until further notice, which shouldn’t surprise anyone.
But the free trial may return at some point. For example, with the launch of version 5.1, Midjourney brought back the free trial for one weekend.
However, to use Midjourney at any time, you need to purchase one of the four subscription plans. The lowest cost is $10 per month. What do you get in return? On average, Midjourney creates a new image in one minute. However, it may take a little longer if you want a resized image or an image with a non-square aspect ratio. Thus, we can assume that the basic, cheapest Basic plan gives you 3.3 hours of GPU time, which is enough to create approximately 200 image generations.
With each higher subscription, you get a higher limit, which allows you to generate more images per month. So, the next plan, Standard, provides 15 hours of fast mode image generation and unlimited slower generation (Relax mode) for $30 per month. This is followed by the Pro plan, which costs $60 per month and provides 30 hours of fast image generation, unlimited slower image generation, and a hidden mode.
In July 2023, the Mega plan was added, which costs $120 and provides 60 hours of fast image generation and, of course, unlimited hours in Relax mode.
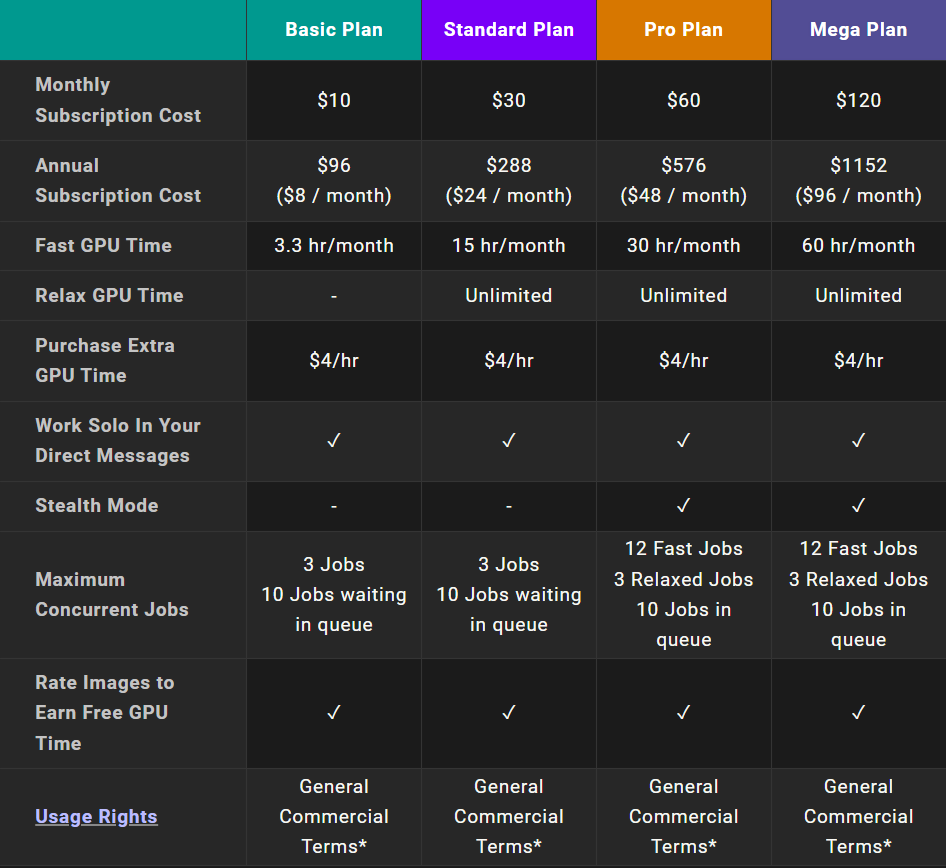
As you can see, all higher-level Midjourney plans offer unlimited photos in Relax mode, but you’ll need to wait up to 10 minutes to receive your images.
The lowest tier doesn’t have this feature, but it costs $10 per month, so it’s worth starting your Midjourney journey with it. This plan allows you to explore the platform, create images, and get familiar with the interface and how text suggestions work. If you like what you see, you can always take it to the next level by simply typing in the /subscribe prompt to be taken to your account, where you can easily upgrade your Midjourney tool.
It is also worth remembering that Midjourney sometimes holds promotions and offers annual plans with a 20% discount:
- Basic plan with an annual subscription – $8 per month
- Standard plan with an annual subscription – $24 per month
- Pro plan with an annual subscription – $48 per month
- Mega plan with an annual subscription – $96 per month.
Midjourney and property rights
AI image generators are trained on billions of images from photographers and artists. Midjourney is no exception. Many artists believe that AI image generators infringe on their copyrights by using their work for educational purposes. Some artists have even filed complaints in the United States against AI image generators such as Midjourney, Stability AI, and DeviantArt. However, the other side argues that the learning process falls under the category of fair use. So, who is the actual owner of an AI-generated image?
Midjourney founder David Holtz admitted in an interview with Forbes that he uses images without the owners’ consent, as it is practically impossible with such a huge data set.
So, we know that these images are copyright-free, but can the graphics you create be copyrighted? The answer is not simple, but in general, we can say that AI artists can use, even commercially, images created by Midjourney, but they cannot prohibit others from using them.
Read also: Geoengineering challenges: EU to ban scientists from ‘playing God’
Alternatives to Midjourney
DALL-E
DALL-E is the first generative artificial intelligence to become very popular on social media. Initially, when it was launched in 2021, the graphics produced left much to be desired. However, the latest version, DALL-E 2, is already on a whole other level thanks to better language understanding and higher image quality. DALL-E can also edit existing images, allowing you to replace or add entirely new objects.
Bing Image Creator
If you need a free alternative to Midjourney, you can choose Bing Image Creator. Bing Image Creator is built into the sidebar of Microsoft Edge, so you can access it while using the browser. Thanks to Microsoft’s partnership with OpenAI, you can use the DALL-E 2 image generator for free via Bing.
DreamStudio
Midjourney currently only works through Discord, which may not be very intuitive to use. DreamStudio, on the other hand, offers a rich website with lots of buttons and knobs that can be customised, but it can feel quite complicated. DreamStudio uses the open source Stable Diffusion model.
Sam Stable Diffusion is free and open source software that you can install and run on your computer. However, it requires some programming knowledge and considerable computing power. For this reason, Stability AI, the company responsible for this model, has created a platform called DreamStudio. Similar to the Midjourney model, Stable Diffusion creates four different images based on a single command (hint). The user can then modify them or use them as a basis for creating new graphics. It is also possible to fine-tune the model so that the images it generates are more consistent with the user’s request, or more calculation steps can be used, which can lead to a more accurate result.
Is Midjourney worth your attention?
Midjourney is known for producing well-structured, defined, and realistic images, making it a strong competitor to other AI tools such as DALL-E and Stable Diffusion.
This tool can create images with a resolution of up to 1792×1024 pixels, which provides greater image detail.
Midjourney works through Discord, a widely used communication platform. Users can interact with the AI bot using simple commands, which makes it accessible even to people without programming experience. At the same time, this is one of its disadvantages, as it is tied to the Discord platform only. Not everyone will like it. For me, it was easier to install the Midjourney app separately.

Although the developers assure that it is the Midjourney Discord server that provides an active community where users can share their creations, ask questions, and get help from both other users and the Midjourney team.
I didn’t like the fact that the generated images are public domain. That is, the images you create with Midjourney do not belong to you. You can use them (with restrictions), even commercially, but they can also be used legitimately by other users. Midjourney even displays the most successful creations, including text tips, on its own website.
The Midjourney team is constantly working on improving and expanding the capabilities of artificial intelligence, ensuring that the tool remains relevant in the ever-evolving AI environment. That is why the tool does not have a free version. This may not appeal to many potential users, but $10 is worth it to generate “real” masterpieces with Midjourney.
Alternatives to Midjourney
Freepik
The Freepik AI Image Generator is a more than capable visual creation tool that has existed since 2023. Constantly updating with the times, today it is a multi-AI model visual creation powerhouse capable of generating competitive, photorealistic images and digital art using a variety of AI modes, including Mystic, Google Veo, and Flux. Additionally, you can take your creations into the Image Upscaler, Background Remover, and Retouch tool for further AI-powered editing.
Read also:
- The best tools based on artificial intelligence
- Bluesky phenomenon: what is the service and how long will it last?


