
© ROOT-NATION.com - Use of content is permitted with a backlink.
In this article, we will explain how to quickly and easily change the administrator in Windows 11. This will allow you to control your operating system.
By default, all new Windows 11 users do not have administrator rights on the computer. These rights are automatically assigned only to the “first” user created during system installation. If desired, a regular user can be relatively easily converted into an administrator.
If you want to give a regular user full control over the operating system, its programs, and settings, there are several ways to do this.

From an administrator account, you can install software and hardware, access any files (including system-protected ones), and manage other user accounts. It is also advisable to have backup administrator accounts in case you forget your password or lose access to your computer.
Let’s look into how to set up a user account with administrator rights in Windows 11.
Read also: How to disable Windows Defender in Windows 11
What permissions does the administrator account have in Windows 11
Before diving into the issues related to changing the administrator in Windows 11, it’s worth considering the permissions you grant to other users. An administrator account in Windows 11 has the highest privileges in the operating system and can perform all actions related to configuring and managing the computer.

Here are a few examples of administrator rights in Windows 11:
- Installing and uninstalling software: An administrator account can install and uninstall software on the computer without restrictions.
- Changing system settings: An administrator can change system settings, such as desktop appearance, system language, and security settings.
- Managing user accounts: An administrator can manage, add, and delete other user accounts, as well as change their permissions.
- Access to all files and folders: An administrator account has access to all files and folders on your computer, regardless of file access settings.
- Editing the system registry: An administrator account can edit the system registry to change system behavior or set additional parameters.
It is important to remember that an administrator account is an extremely powerful tool and can have a negative impact on your computer if not used carefully and responsibly. Therefore, it is recommended to use this account only when necessary and avoid unnecessary interventions in system settings.
Now that you understand the important role of administrator rights, we can move on to the steps for changing the administrator in Windows 11. It’s not difficult. You can do this anytime by going to the system settings. This is one of the most commonly used methods.
Read also: How to use Google Find My Device service to track your lost devices
How to change the administrator in Windows 11
If you want to change the administrator in Windows 11, you can use several methods including Settings app, Command Prompt, or Control Panel. It’s worth noting that Windows 11 can have multiple administrator accounts. This means you can turn a new account into an administrator without changing the current administrator account to a regular user account.
If you want to have only one administrator account, you can add administrator permissions from a regular user account to the administrator account, and then change the current administrator account to a regular user account.

Additionally, you can also change the administrator’s name in Windows 11. After doing so, the administrator account will have a new name, but personal files and the desktop of the administrator account will remain unchanged.
So, let’s get started and learn how to change the administrator in Windows 11.
Read also: How to Run ChatGPT as a Windows Program
Change the Windows 11 administrator in the settings
This is one of the simplest and most convenient ways to change the administrator in Windows 11. To do this, follow these simple steps:
1. Open Settings. You can do this by clicking on the Start icon.

2. Go to the Accounts section.

3. In the Accounts settings, select the Family section.

4. In the Your family section, tap Add someone.

5. Select the account you want to set up as an administrator and click Set up as administrator.

6. Confirm your decision by clicking Yes.
And there you have it! Now you know how to change the administrator in Windows 11. After following the steps above, your new account will be set up as an administrator with full control over your computer and its settings.
It’s important to note that this feature has some limitations. For example, you cannot set a Microsoft account as an administrator directly. In such cases, you’ll need to create a new local account and set it as an administrator.
Read also: 6 Best Celebrity Voice Changers You Should Try Out
Change administrator via user account
It’s straightforward, though not everyone may find it convenient to do. It’s worth noting that inexperienced users aren’t fond of making changes outside of Settings. However, the method exists, and we’ll go through it.
- Right-click on the Start menu and select ‘Run.’ In the dialog box, type netplwiz in the text field and click OK.

2. You can view all user accounts on your computer in the Users section.

3. Then click on the desired account and open the Properties below.

4.Go to the Group Membership tab, select Administrator, and save your changes by clicking Apply and OK.

Now the selected account will be the administrator of your Windows 11 device. It’s simple and easy. You can change the administrator at any time by selecting the desired account.
Read also: Qualcomm Snapdragon X Elite for Laptops: Everything You Need to Know
Change the administrator in the Control Panel
There’s also the option to change the administrator using Control Panel. Some say the panel itself is outdated, but believe me, many users still trust it. So, here’s what we need to do:
- Open the Control Panel. To do this, write Control Panel in the search field and open it.

2. In the User accounts section, click on Change account type.

3. In the new interface, click the user account you want to change to administrator, and then select Change account type on the left.

4. Select the Administrator checkbox and click Change account type. You can change your account to a standard account in the same way.

This is enough for this account to become the administrator of your Windows 11 PC.
Read also: What is a Security Patch and Why Is It So Important?
Change the administrator in the command line
Experienced users often prefer the old methods of changing settings in Windows. Among them is the command line. That is, you can change the administrator on the command line as well. To do this:
- Run the command prompt as administrator in Windows 11.
2. In the dialog box that appears, type: net user and press Enter to get a list of all local user accounts on your computer. Write down the name of the account you want to change to administrator.

3. Enter the command: net localgroup Administrators “name” /add.
Note that you should change “name” to your account name.
To change the account type back to standard, use the command: net localgroup Administrators “name” /delete.
After rebooting the system, the new Administrator will have access to all the settings of your Windows 11 device.
Change administrator in computer management
The last method, which works on all versions of Windows except Home, is to open Computer Management. To do this, follow a few simple steps:
- In the Search field, simply type Computer management.

2. In the left pane, double-click Local users and groups, and then click Users.
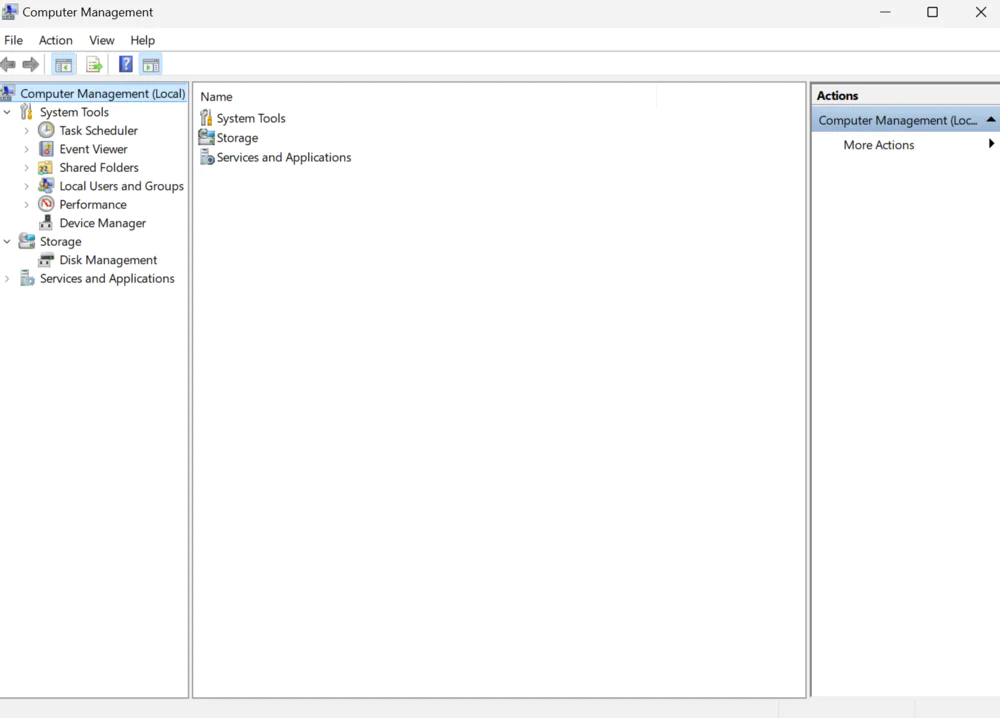
3. In the “Computer Management” window, you’ll see all user accounts on your computer, including hidden or disabled ones. Double-click the user account that you want to set as an administrator.

4. The Properties window opens for the selected user. Go to the Participant tab and click the Add button.

5. In the Select Groups window, type Administrators, click Verify Names, and then click OK.

6. You will be returned to the Properties window where the user was added as a member of the Administrators group. Click OK, and you’re done.

That’s all the information you need to know to change the administrator in Windows 11. We hope that using our guide, you won’t encounter any serious issues and will smoothly navigate through the entire process.
Remember, how your laptop or PC on Windows 11 operates depends on your actions. We’ll do our best to assist you along the way!
Read also: