
© ROOT-NATION.com - Use of content is permitted with a backlink.
Most people tend to over the Google Calendar service, which is a part of productivity applications. Some might just view this as a regular calendar application and not pay much attention to it as to then its basic function is telling the date. If you are a part of these people, then you must note that there are a lot of impressive productivity features that are packed into this mobile and web application.
In this article, we’ll show you how to get the most out of your Google Calendar app on your web browser. We’ll also show you how to get the most out of this application and increase your productivity at work or school. If you use an Android device, then the Google Calendar app might have been sitting on your smartphone all this while and not being put to good use.
This article will change that by showing you all that you can achieve with Google Calendar. You’ll learn a ton of features and functions that are packed into this Google service. First, we’ll show you the basic control that you’ll need to know to enable you to unlock all functions locked into Google Calendar.
Read Also: How to use Spotify Collaborative Playlist
Accessing Google Calendar

You can access Google Calendar on any of your devices like your smartphone, tablet, laptop, and desktop. For your mobile devices, Android users will find that the Google Calendar app comes pre-installed with their smartphone. If you make use of an iOS device, on the other hand, you’ll need to install the Google Calendar app from the App Store.
Regardless of the device that you use, it’s important to access your Google Calendar from a web browser (especially when editing your calendar). This will give you access to all the productivity features that Google has in store for you. In this article, we’ll focus on showing you how to navigate and organize your Google Calendar via the web platform.
In order to access the web platform, simply head over to your browser and calendar.google.com. This will pull up the calendar for the Google account that your browser is making use of. From here, you can take many steps and actions in editing and organizing your calendar.
Read Also: What Will Happen to Windows 10 After Support Ends
How to create an event in Google Calendar


Once you open the Google Calendar platform on your browser, you’ll be greeted with the layout and can proceed to create an event. To create an event, most people will make use of the “Create” button that is at the top left-hand side of the screen. But we have a better and more in-depth way to do this, all you need to do is take the following steps:
- On your calendar, double-click on the day that the event will take place
- From this page, you can add a title to your event
- Using the date buttons, you can select the duration of the event
- If you want to edit how often you get reminders on the event, the “Do not repeat button” can be put to use
- Next, add your notification using the notification tab
- Lastly, you can add a description (you can also add documents, which is great for productivity usage) of the event so you don’t forget what you set the reminder for
- Lastly, hit the save button at the top of the page next to the title tab.
By taking these few steps, you’ll have successfully created an event. Once the date for your event arrives, you’ll get a notification across all your devices with your Google account on the event. This step here is ideal for creating events for just yourself, but the next guide will help you to create events and add other participants.
How to add others to an event on Google Calendar
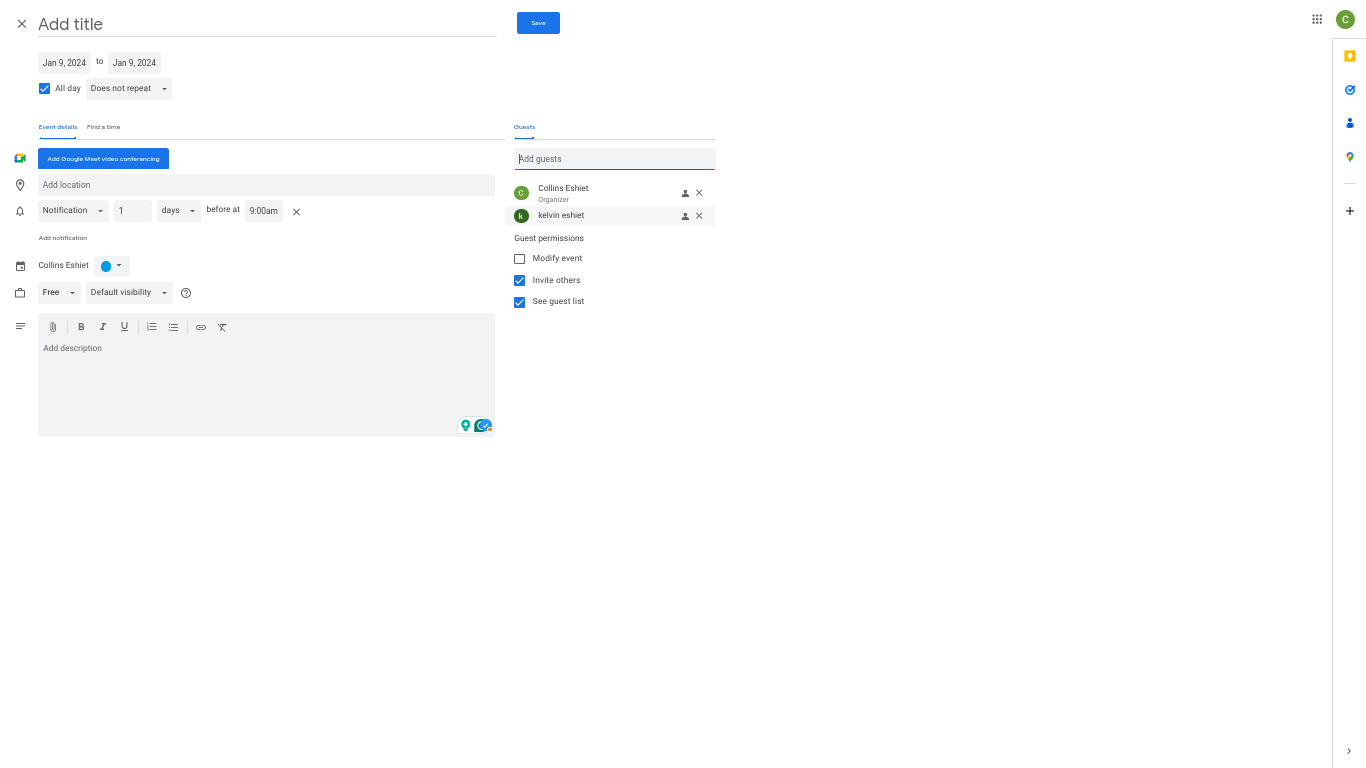
If you want to create an event and add others to the event, you can also do this directly from the Google Calendar web page. This is ideal if you have a big event coming up, and you need to attend with a few friends or business associates. Google Calendar lets you add these individuals to your event by taking the following steps:
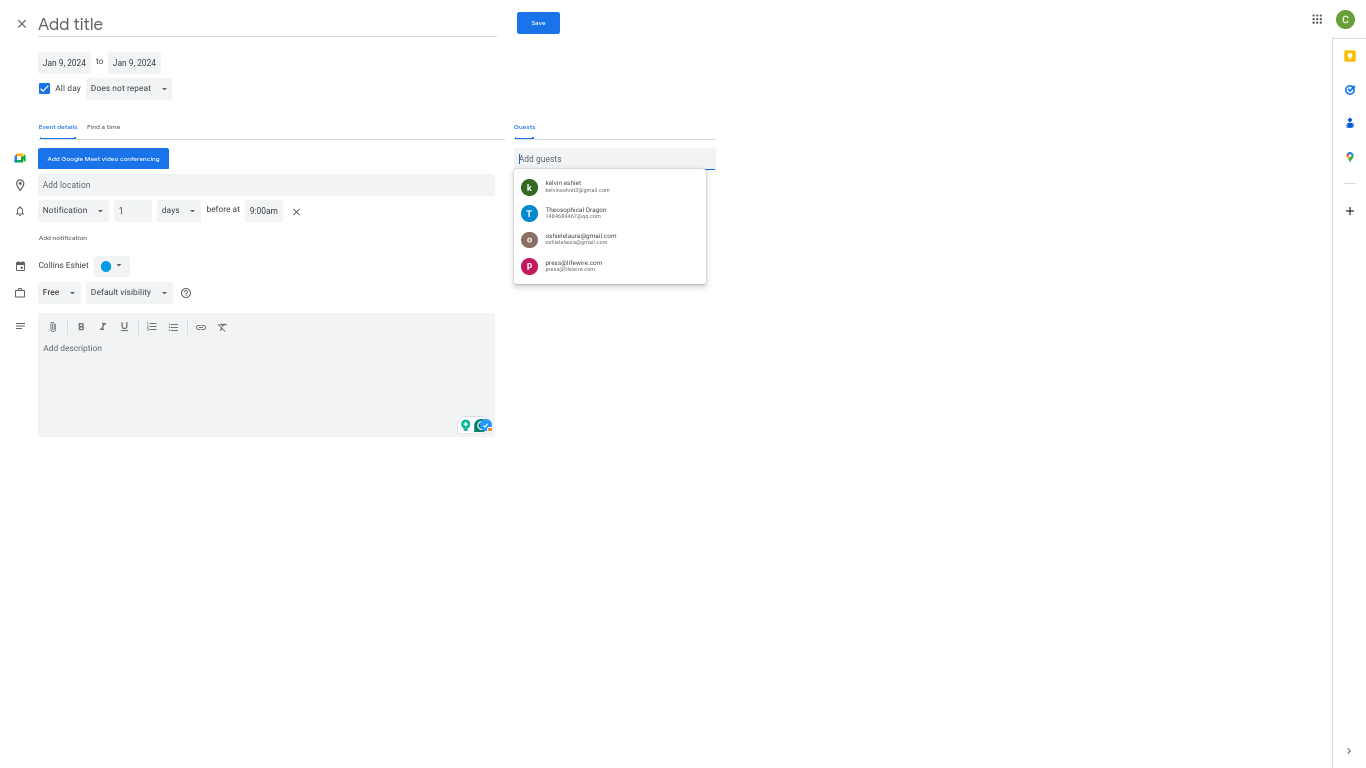
- On your event creation tab, glide your cursor over to the Guest section
- From here you can add your guest using their email address
- Simply type in their email address into the provided column and they’ll be added to your event
- Being the host, you can edit your guests’ permissions
- Once you’re done adding your guests and editing their permissions, you can proceed to save your event.
Once the event is saved, your guests will all get a notification of the event that you created. They can then access it from their own Google Calendar apps or the web platform. Now that you know how to add others to your Google Calendar event, you need to learn how to add a location or Google Meet link to your event.
How to add a location or Google Meet link to your Google Calendar event

While adding others to your event, you’ll need to give the guests full information about the event. This includes the location where the event will take place and directions to that location. If the event is virtual (like a Google Meet conference call) then you’ll also need to specify that on the event as well. Here is how you can add a physical location or a virtual Google Meet link to your event:
- To add a location to your event, simply click on the “Add location” tab and type in the location
- Clicking on the map icon next to the “Add location” tab will pull up Google Maps for easy navigation
- To add a Google Meet link for a virtual event, simply click on the “Add Google Meet link” button
- This will create a Google Meet link that guests can use to join the meeting during the event.
These features are very important for users who are making use of the Google Calendar platform for professional reasons. Even if you aren’t using this platform for a professional reason, you can still make use of these features when creating an event. Now let us look at yet another important feature on the Google Calendar platform that you can also make use of when setting events or reminders, colour coordination.
How to use colour coordination on Google Calendar

Colour coordinating your Google Calendar is very important as it helps your calendar to not be easily understandable. Google offers a handful of colours that you can use to coordinate events on your calendar. You can use each colour to represent various activities that you might save on your calendar.
In total, there are currently 11 colours (you can also create more colours yourself) that you can use for various events, reminders, tasks, or appointment schedules. With this wide variety of colours, it’s easy to pick one to represent each task that you have on your calendar. So, once you open your calendar, you can tell which tasks you have coming next just by glancing at the colours.
To access the colours for coordination, create an even and tap on the colour circle next to your name on the interface. You’ll find this just under the notification section of the interface. Now that you understand how to colour-coordinate your Google Calendar, let’s show you how to view your calendar and share your calendar with others.


To view your calendar, simply make use of the controls on the title bar and taskbar of the web platform. By using the box next to the setting icon on the title bar, you can choose how you want to view your calendar. The options they have for the calendar view are day, week, month, year, schedule, and a 4-day view.
You can choose whether to show weekends, declined events, completed tasks, and appointment schedules. This will help to organize the calendar view to match the user’s taste and preferences. With these tools, browsing through the calendar is easy and hassle-free. To share your calendar with others, take the following steps:
- Head over to the “others calendar” tab
- Click on it and select “Create new calendar”
- From here you can add a name, description, and time zone to your new calendar
- Once you’re done with that, save the calendar
- After it’s saved, you can go ahead to add people to your calendar using the “add people and groups” button
- You’ll find this button under the “share with specific people or groups” section
- People you add to your calendar (using their email addresses) will get an invitation to join the calendar.
With this guide, you can go on to use your Google Calendar more effectively. Whether it is for personal usage or work purposes, this guide will help you to better navigate your Google Calendar. Now you can go ahead to make use of your calendar like a pro and get more productive at work or school.
Read Also:
- YUNZII B75 PRO Wireless Mechanical Keyboard Review
- Steelseries Arctis Nova 5P review: mid-range PS5 headset with game-changing features