
© ROOT-NATION.com - Use of content is permitted with a backlink.
Interested in disabling Windows Defender on Windows 11 so you can replace it with another antivirus solution? Then you’ll find this guide helpful.
Windows Defender is the built-in antivirus program that comes with Windows 11. While effective, some users prefer to disable it for various reasons, such as using a different antivirus software. Let’s delve into the details.
Read also: How to Run ChatGPT as a Windows Program
What is Windows Defender?
Before explaining how to disable Windows Defender on Windows 11, it’s important to understand its purpose. Windows Defender operates in the background and provides several layers of protection, including real-time program activity monitoring, scanning of network files, and protection against its own spam mechanisms. It’s also responsible for conducting periodic scans of critical areas of the operating system.

Microsoft Defender is signature-based antivirus software that scans files by analyzing databases of known patterns. This enables it to provide basic data protection for users.
However, many users wonder how to disable Windows Defender in Windows 11. There can be various reasons for this decision. Some users are concerned about the high resource consumption it entails. Others cite its perceived low effectiveness. Finally, in very specific cases, Defender may not recognize installed third-party security solutions, leading to even higher resource consumption.
Overall, Windows Defender provides quality deep monitoring of inbound and outbound traffic, but sometimes it may block fewer suspicious connections compared to its competitors.
However, Windows Defender is quite a capable antivirus software that is often as good as or even better than its competitors. Moreover, it is completely free and already included in your Windows 11 installation. Therefore, consider whether it’s worth removing it and installing third-party antivirus software.
Read also: Qualcomm Snapdragon X Elite for Laptops: Everything You Need to Know
Should I disable Windows Defender?
Windows Defender should only be disabled if the user is fully confident in their decision and installs another antivirus program that performs the same function. Using multiple antivirus programs simultaneously can lead to conflicts and system instability, which can negatively impact system performance. Therefore, it is important to disable Windows Defender only when necessary and as recommended by the manufacturer of the alternative antivirus program.

There could be various reasons why someone might want to disable Windows Defender. For instance, it might interfere with the operation of certain programs and applications. Microsoft Defender might block the installation of a legitimate and safe program because it mistakenly identifies it as harmful, prompting users to temporarily disable it. Alternatively, some users simply dislike Microsoft Defender and prefer to remove it from their computer. This sentiment is common among users who believe Microsoft cannot create quality antivirus software. Others may just be accustomed to a different antivirus program they have used for years and are reluctant to switch.
Regardless of the reason, continue reading to learn how to temporarily or permanently disable Windows Defender in Windows 11.
Read alsо: What is a Security Patch and Why Is It So Important?
How to disable Windows Defender
Interestingly enough, Microsoft allows you to disable and even uninstall its Windows Defender. Furthermore, there are several ways to accomplish this, allowing each user to choose the method they prefer. However, it’s important to remember that disabling Windows Defender can potentially expose your Windows 11 device to risks. So, let’s go through everything step by step.
Through system settings
The simplest and most commonly used solution is to apply system settings where you can disable Windows Defender. Doing so is very straightforward. So:
- Click on the Start menu and go to Settings.

2. On the left, open “Privacy and security”, and then select “Windows security”.

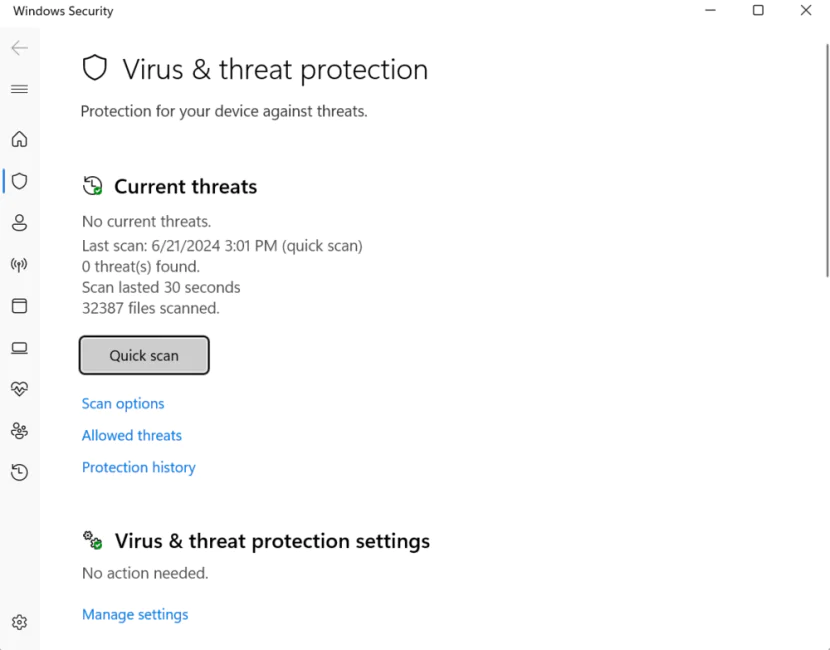
3. You will be taken to the “Protection zones” section, where you should select “Protection against viruses and threats”.

4. You will directly access the Windows Defender settings. Open “Manage settings”, then simply turn off Windows Defender under “Real-time protection”.
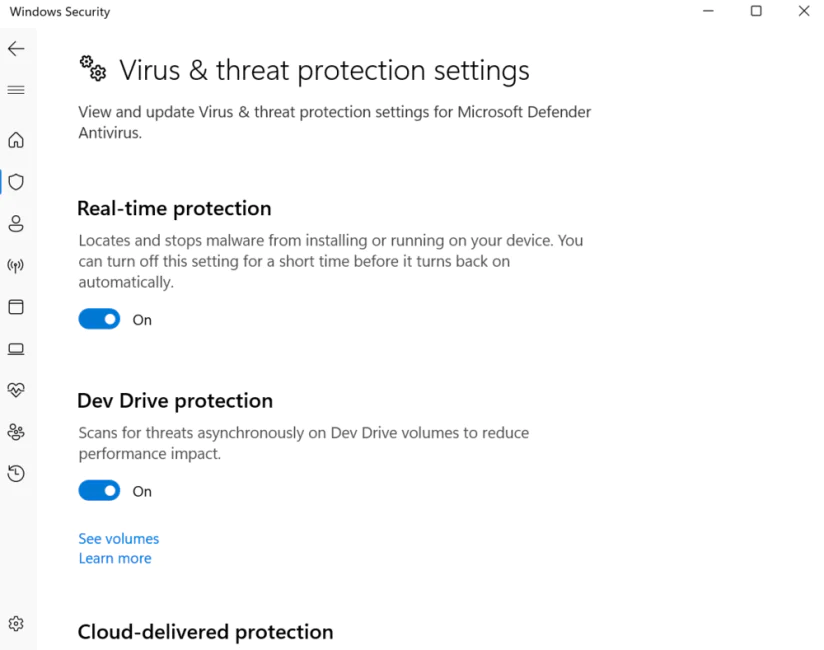
5. After turning off Windows Defender, you will be prompted to confirm the changes. Click “Yes” to confirm.
If you were looking for how to temporarily disable Windows Defender in Windows 11, this should help solve your issue. After disabling the program, you can install and use another antivirus software instead of Windows Defender. However, remember that Windows Defender is an important security tool for your system, and disabling it may increase the risk to your computer’s security.
But please note, disabling Windows Defender does not remove it from Windows 11; you are simply turning off its real-time protection. If you change your mind later, you can easily turn it back on, and Windows Defender will resume protecting your PC or laptop running Windows 11.
Read alsо: 10 Mistakes That Simplify the Work of Hackers
Through the registry editor
You have the option to disable Windows Defender through the Registry Editor. I always caution against making changes in the Registry Editor because it can lead to system crashes and issues with the operation of Windows 11. However, since this method exists, I’ll explain it as well.
- First, you need to open the Registry Editor. To do this, right-click on the Start menu, select “Run,” and type regedit in the text field. Then press Enter.

2. In the registry editor, follow this path HKEY_LOCAL_MACHINE\SOFTWARE\Policies\Microsoft\Windows Defender

3. Create a new value by right-clicking on the “Windows Defender” folder, selecting “New,” and then choosing “DWORD (32-bit) Value.”

4. Name a new value for DisableAntiSpyware.

5. Double-click the new value to edit it and set it to “1”.

6. Click OK and close the registry editor.
This method allows you to completely disable the built-in antivirus software provided by Microsoft.
Read also: Neuralink Telepathy chip: what it is and how it works
Through the Group Policy Editor
Windows 11 also allows you to disable Windows Defender using the Group Policy Editor. Doing this is also quite straightforward.
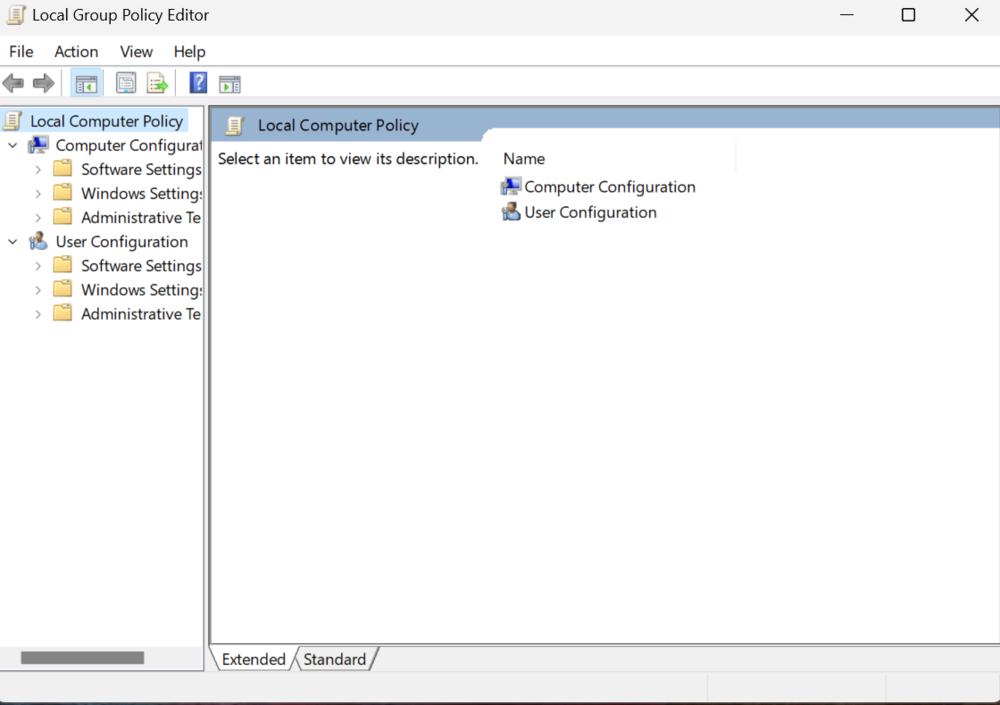
- Right-click on the Start menu, choose “Run” from the options, and type gpedit.msc into the text field. Then press Enter.

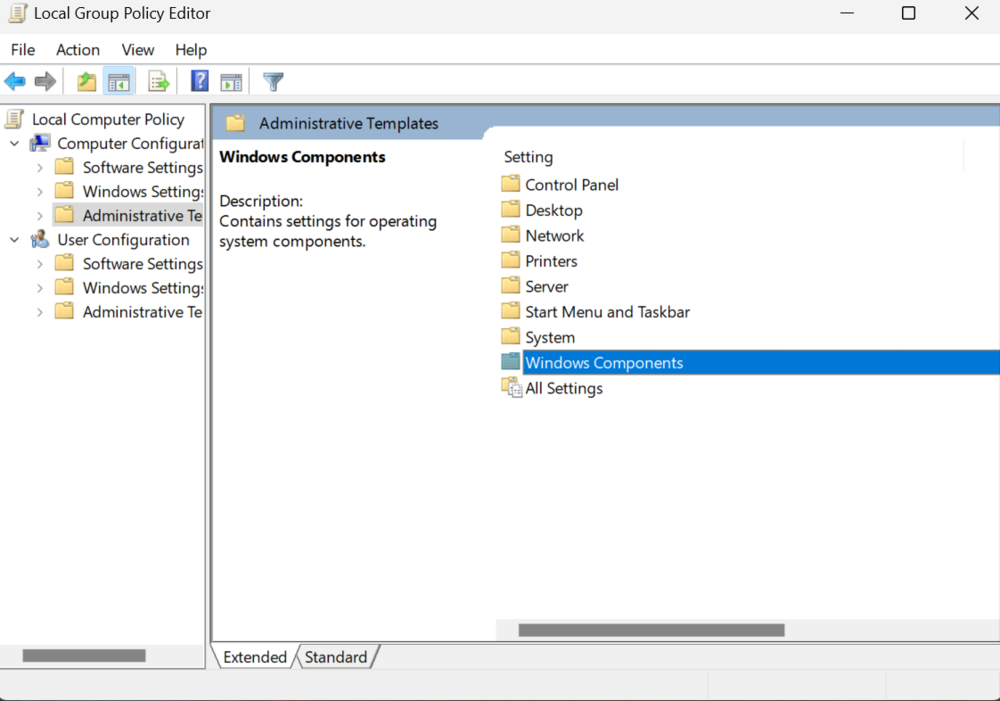
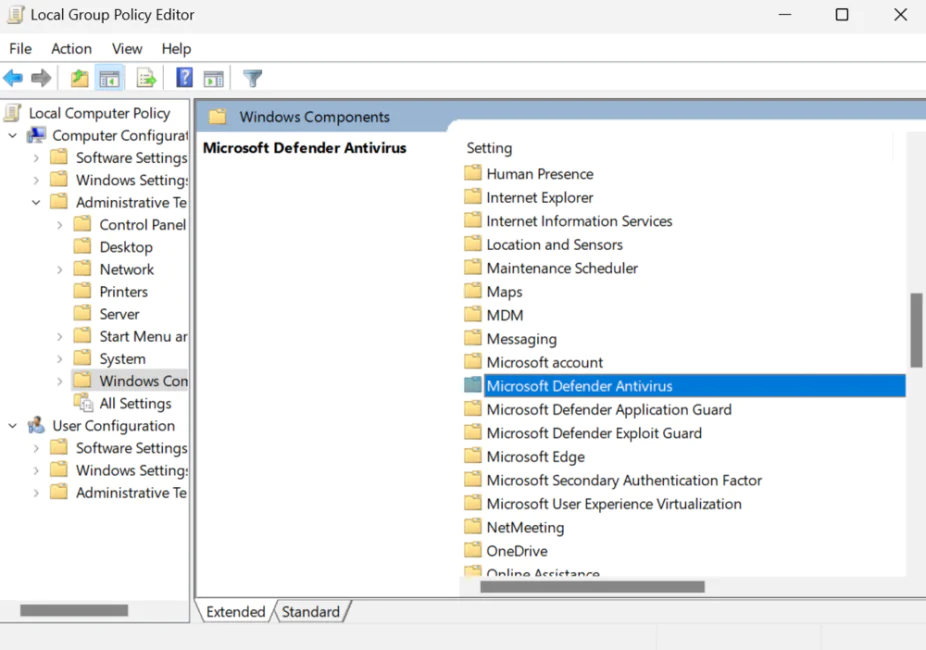
2. In the Group Policy Editor, navigate the following path: Computer Configuration -> Administrative Templates -> System -> Windows Defender Security Center -> Windows Defender Antivirus.
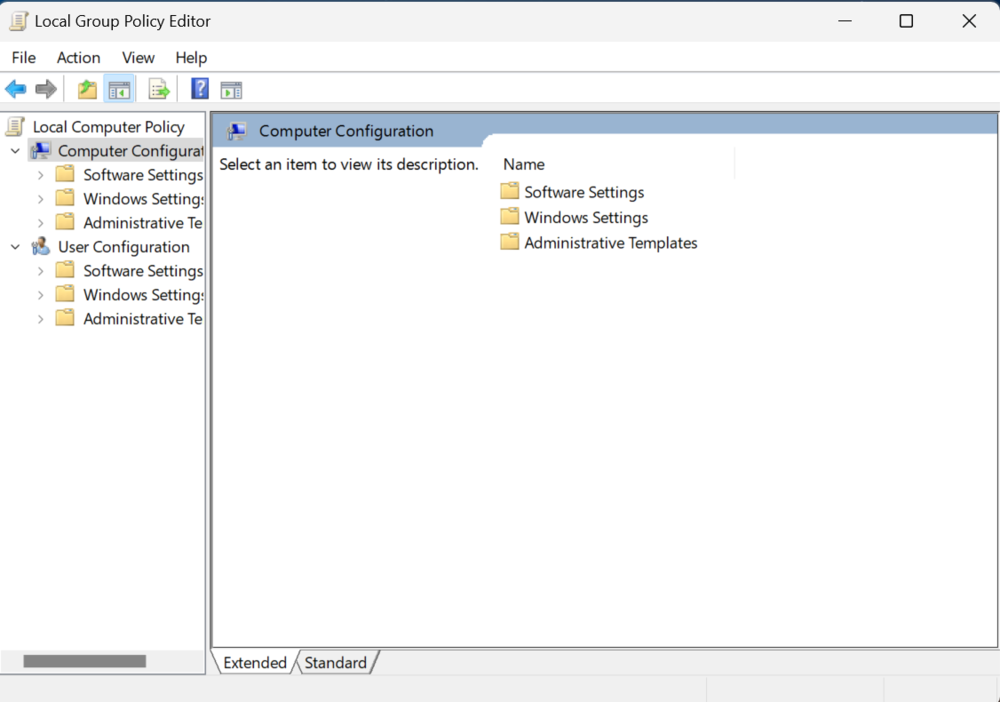
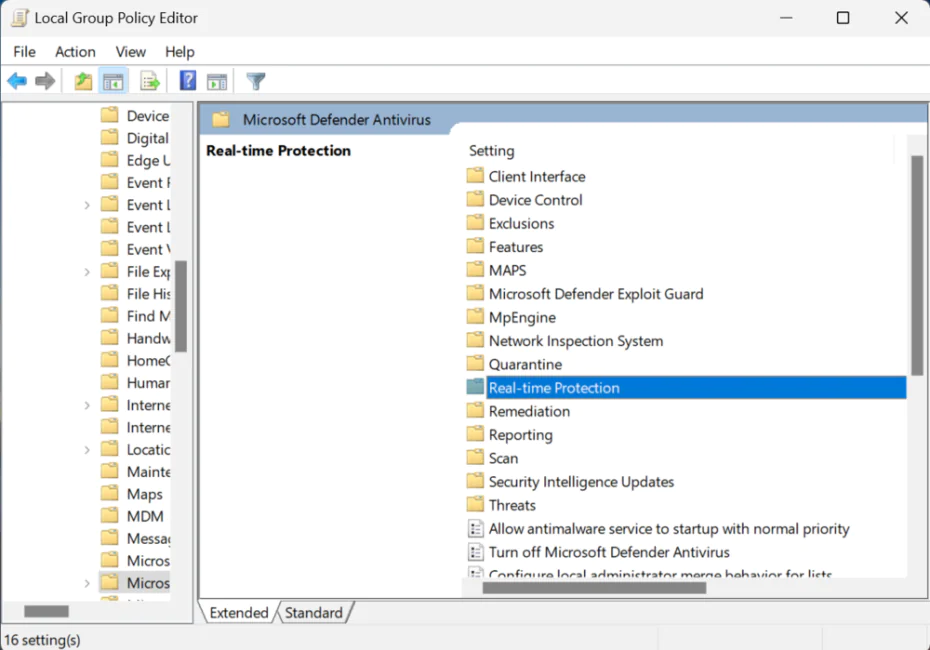
3. Check the “Turn off Windows Defender antivirus” option.
If you follow these steps, Defender will be deactivated on your device.
Read also: What is Spatial Audio, How Does It Work, and How to Use It
Through the command line
As with other settings in the latest Microsoft system, you can use the command line to disable the default antivirus program.
Windows 11 will allow you to do this by following these steps:
- Open the Command Prompt by right-clicking on the Start icon and selecting “Command Prompt (Admin)” or “Windows Terminal (Admin).”

2. Enter the following command: sc stop WinDefend
3. Press Enter.
And that’s it! Now you know how to disable Windows Defender in Windows 11 using the Command Prompt.
Through the Task Manager
Microsoft also allows you to disable Defender through Task Manager. However, here you can only stop the operation of the antivirus from the American corporation. Yet, this is exactly what some users often need. So:
- To open the necessary section, right-click on the Start menu and select Task Manager.
2. Here, you need to open the Processes tab. It is typically the first tab displayed when Task Manager is launched..

3. Find the “Antimalware Service Executable” and open it. This is where our Defender will be located.

4. Right-click on it and select “Stop.” The antivirus software will halt its operation.

So you’ve disabled it in Windows 11, albeit temporarily.
Read also: Phi-3-mini – Microsoft’s Breakthrough in Artificial Intelligence?
Conclusion
As you can see, Windows 11 offers several methods to disable or even remove Windows Defender from the system. Everyone chooses the method that is most convenient for them. However, it’s advisable that immediately after disabling Windows Defender, you install another antivirus software solution.

But I’ll remind you once again to consider whether it’s worth doing this. If you’ve never had issues with Defender and it has been working smoothly on your PC, perhaps there’s no need to change something that works well? Ultimately, the decision is yours to make. Remember, your online security and protection of personal data are in your hands! We can only advise and offer solutions to problems.
Read also:
- What is HDR in monitors and how to properly adjust it
- Transistors of the Future: New Era of Chips Awaits Us