© ROOT-NATION.com - Use of content is permitted with a backlink.
I was supposed to review the Gorilla Custom X stand a year ago. Since then, I’ve changed two studios and three cameras. Still, I make sure to follow through on my commitments—even if this turns out to be one of the most challenging reviews I’ve ever done. On top of that, my particular unit is one of only two in existence and the only one in the world with my custom modifications.

Gorilla Custom X video review

Price
You can order a model identical to mine for $120 or roughly €115. However, at the time of writing and filming, only two units existed. This is a handmade product—crafted in Ukraine with an exceptional level of professionalism. In some areas, the build quality even surpasses what you’d expect from mass production.

You can probably see why criticizing a handmade Ukrainian product feels somewhat uncomfortable. But rest assured, I will critique it—just not in the way you might expect. The manufacturer is already well aware of all my concerns, as I’ve previously provided feedback. In fact, not long ago, I even consulted with them on how a new version of the stand could potentially be adapted for S.T.A.L.K.E.R. 2.
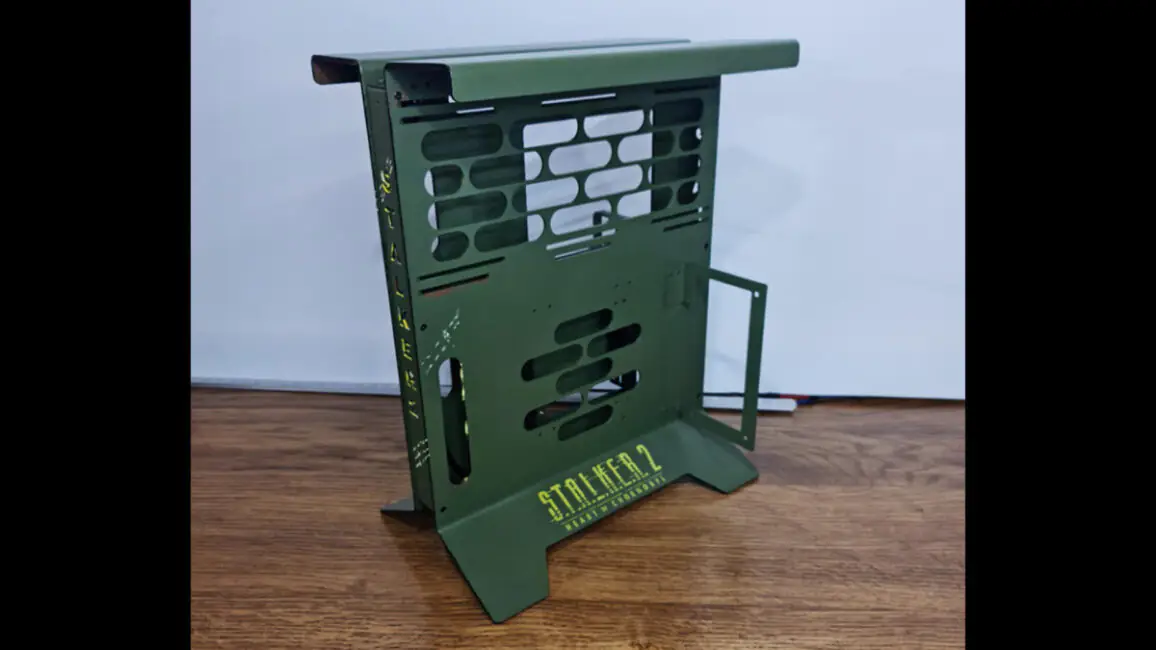
One of the key advantages of handmade products is that the manufacturer actually listens to feedback. This model was built specifically for me and my needs from the start. I wanted a vertical demonstration stand—one that would be as universally compatible as possible with everything: fans, heatsinks, motherboards, storage drives, and graphics cards.
Compatibility
The Gorilla Custom stand was designed to accommodate high-end components like the Arctic Freezer II 420mm, ASUS RTX 4090, and the compact ASUS ROG Strix X670E motherboard while maintaining a solid, functional, and visually cohesive design. So far, it manages to handle these demands—though not all components at the same time, at least for now.

The second challenge in reviewing this stand comes from the fact that, in theory, test benches are straightforward to evaluate. It’s essentially a metal frame—either it fits the required components, or it doesn’t. There are no restrictions on GPU size, CPU cooler height, radiator dimensions, or PSU length, which simplifies compatibility concerns compared to traditional cases.

But of course, there are limitations. This is, first and foremost, a demonstration stand, not a traditional test bench or workstation. As a result, certain features are absent—most notably, dedicated mounting points for storage drives. Technically, there are slots for 2.5-inch drives, but accessing them requires partially disassembling the stand, which isn’t the most convenient solution.
Cooling
Next, there are no dedicated mounting points for external fan brackets—none at all. The stand includes mounting options for liquid cooling, supporting 240mm or 280mm radiators. While you can use this to display a 420mm radiator, the positioning of the tubing could be an issue. You’d need to route them from the bottom, as the metal frame obstructs space at the top.

On the other hand, the stand allows for a vertical GPU installation, with a mounting bracket included. You can also add a plexiglass support bracket to provide additional stability for the graphics card.

The RGB lighting is present and can be synchronized with the motherboard. The frame for the graphics card feels fairly relaxed when positioned horizontally, but vertically, it becomes a solid unit.
Modifications and features
Now, let me smoothly transition to some general aspects of the PC build. The Gorilla Custom weighs 9 kg on its own, just the stand. It’s not the heaviest component I’ve reviewed, as the Fractal Design Define 7 XL tipped the scales at 16 kg. But it’s still quite substantial. To understand where this weight comes from, here’s an example.

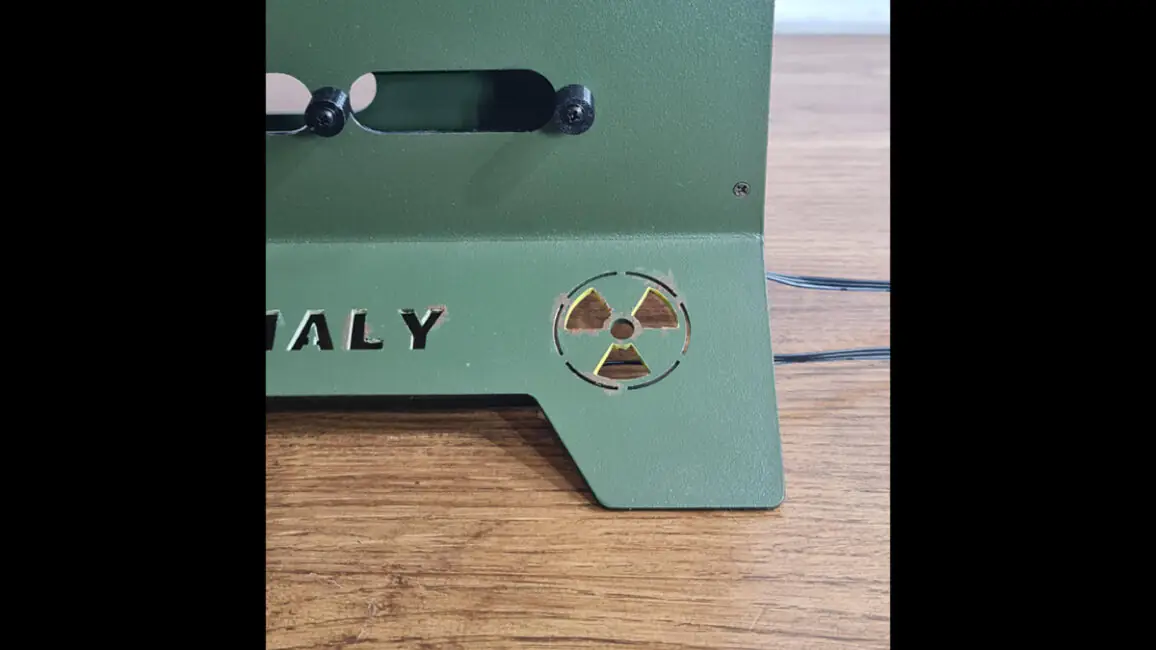
For one of the Gorilla Custom X modifications, which I’ll explain later, I made a few holes in the base. Just take a look at this metal.

This is industrial-grade steel, and not all PC cases have tempered glass this thick. In most standard cases, if one side is more than half a millimeter thick, it’s considered almost excessive. Here, it’s 4 mm. I don’t think the Gorilla Custom would stop a bullet, say, from a .22LR, but if it did, I wouldn’t be surprised.

Drawbacks
However, let’s move on to the drawbacks. They all stem from the fact that, first and foremost, I’m a reviewer, and only secondly a user. As a user, I’m impressed with the case. As a reviewer, I have some issues. And… yes, the test bench would have suited me better than the display model.

For example, these cut-off feet don’t fit on the Vivat Turn Table D-26. It’s also a Ukrainian-made product, by the way.

These feet are the main focus of my modification. Besides not fitting on the turntable, they’ll scratch a regular desk when placed on it. That’s because it’s metal, not rubber, and there are no rubber pads here. The stand comes with a leather mat, but that’s only useful if the stand doesn’t need to be moved around frequently.

So, something had to be done with the feet, and I took it upon myself. What helped me was the fact that the manufacturer includes a leather mat as a gift, which happens to be the perfect size for placing the Gorilla Custom on to avoid scratching the desk surface. After that, a bit of work with hot glue, some scissors, and sacrificing the mat, and we ended up with leather feet.

And on the bottom… and on the top. Because I also had to flip the stand upside down, and there are no feet on top, just like on the bottom.

This modification of mine might appear in future versions of the stand, if luck is on my side. Perhaps the manufacturer will consider ordering separate rubber feet. In any case, you shouldn’t encounter my issue in the upcoming versions.
Recommendations for assembly
There are a few more details that you won’t see in future versions. I really, REALLY hope you won’t. Some of them can be minimized by slightly changing the PC assembly order, but some remain, and they’re still relatively unpleasant. First of all, cable management.

Cable management is, in fact, almost nonexistent. Access to the connectors at the top of the case ranges from problematic to impossible. The issue could be resolved with either simple holes in the metal or slanted cutouts that would provide access to the screws. These could, for example, be magnetically mounted—easy to remove, easy to install.

The central cable management holes don’t function as intended. They’re there, but for instance, the top hole is blocked by the perforated section when it comes to the motherboard, and the bottom hole is obstructed by the graphics card.

Additionally, there are no cable holes for the 4+4 pin CPU power connector. It’s impossible to install or remove it once the motherboard is installed and screwed in. The same issue applies to the cooler fan—upper mounting positions are completely inaccessible. Moreover, installing most coolers with the motherboard already in the case is impossible since there’s no hole in the back wall of the Gorilla Custom X. There’s perforation, but it’s not suitable for screw tightening.

These problems can be solved relatively simply—by changing the assembly sequence of the PC. First, install the cooler on the motherboard. Then, immediately connect the fan. After that, make sure to connect the CPU cable to the motherboard. You can also do the 20+4 pin, but it’s less critical compared to the CPU cable.
Read also: Review and Comparison: Zalman Z10 Plus vs. Zalman Z10 Cases
Next, screw the motherboard into the case, everywhere except the top screws. You can screw those in too if you can reach them—I couldn’t. After that, connect the 20+4 pin cable. Then, install the graphics card. That’s pretty much it.
Cons
Yes, there are drawbacks to the case that can’t be fixed by changing the assembly sequence. The power button doesn’t have any indicators on the connectors, so you’ll need to connect it about 50% blind. As for connecting the RGB on the case—in my specific situation—I needed a special adapter that came with the motherboard. However, I had two motherboards where this cable was missing.

Yes, these adapters can be purchased, but only through AliExpress. Unfortunately, they’re not available in Ukraine, so make sure to check in advance if you have one. I really hope that this cable will be included in the package with all future cases, even if it means a small additional cost.
UPD: cables should really be included with all new stands
Conclusions
In conclusion, I’ll remind you of this: the Gorilla Custom X is an example of the fact that computer components, and not just computer components, made in Ukraine, EXIST, and they’re of exceptional quality. I’ve already reviewed the Vivat turntable for photography, I’m aware of premium audio brands like Verum Audio, the planar drivers produced by Rinaro, the re-housing of optics by Iron Glass, and many others.

The point is that when you look at the Gorilla Custom X, you realize that supporting Ukrainian manufacturers is an easy choice, because Ukrainian-made products are, at worst, competitive, but usually just top-tier. And this one is top-tier—not just in terms of quality, but also in terms of the personal approach involved.
And that’s probably all from me. Don’t forget to leave a comment if you’d be interested in me making a separate video about Ukrainian tech manufacturers. Because while making a stand, no matter how high-quality, is one thing, creating drivers for planar headphones like the Meze Empyrian at $3000 is a completely different story. So, feel free to write your thoughts!
Read also:
- Review of be quiet! Silent Loop 3 240mm Cooling System
- Cougar Uniface Mini RGB Mini Tower Case Review
- Review of the be quiet! Light Wings LX Fan Series: 120mm, 140mm, and More